Use Markdown in a Jira issue
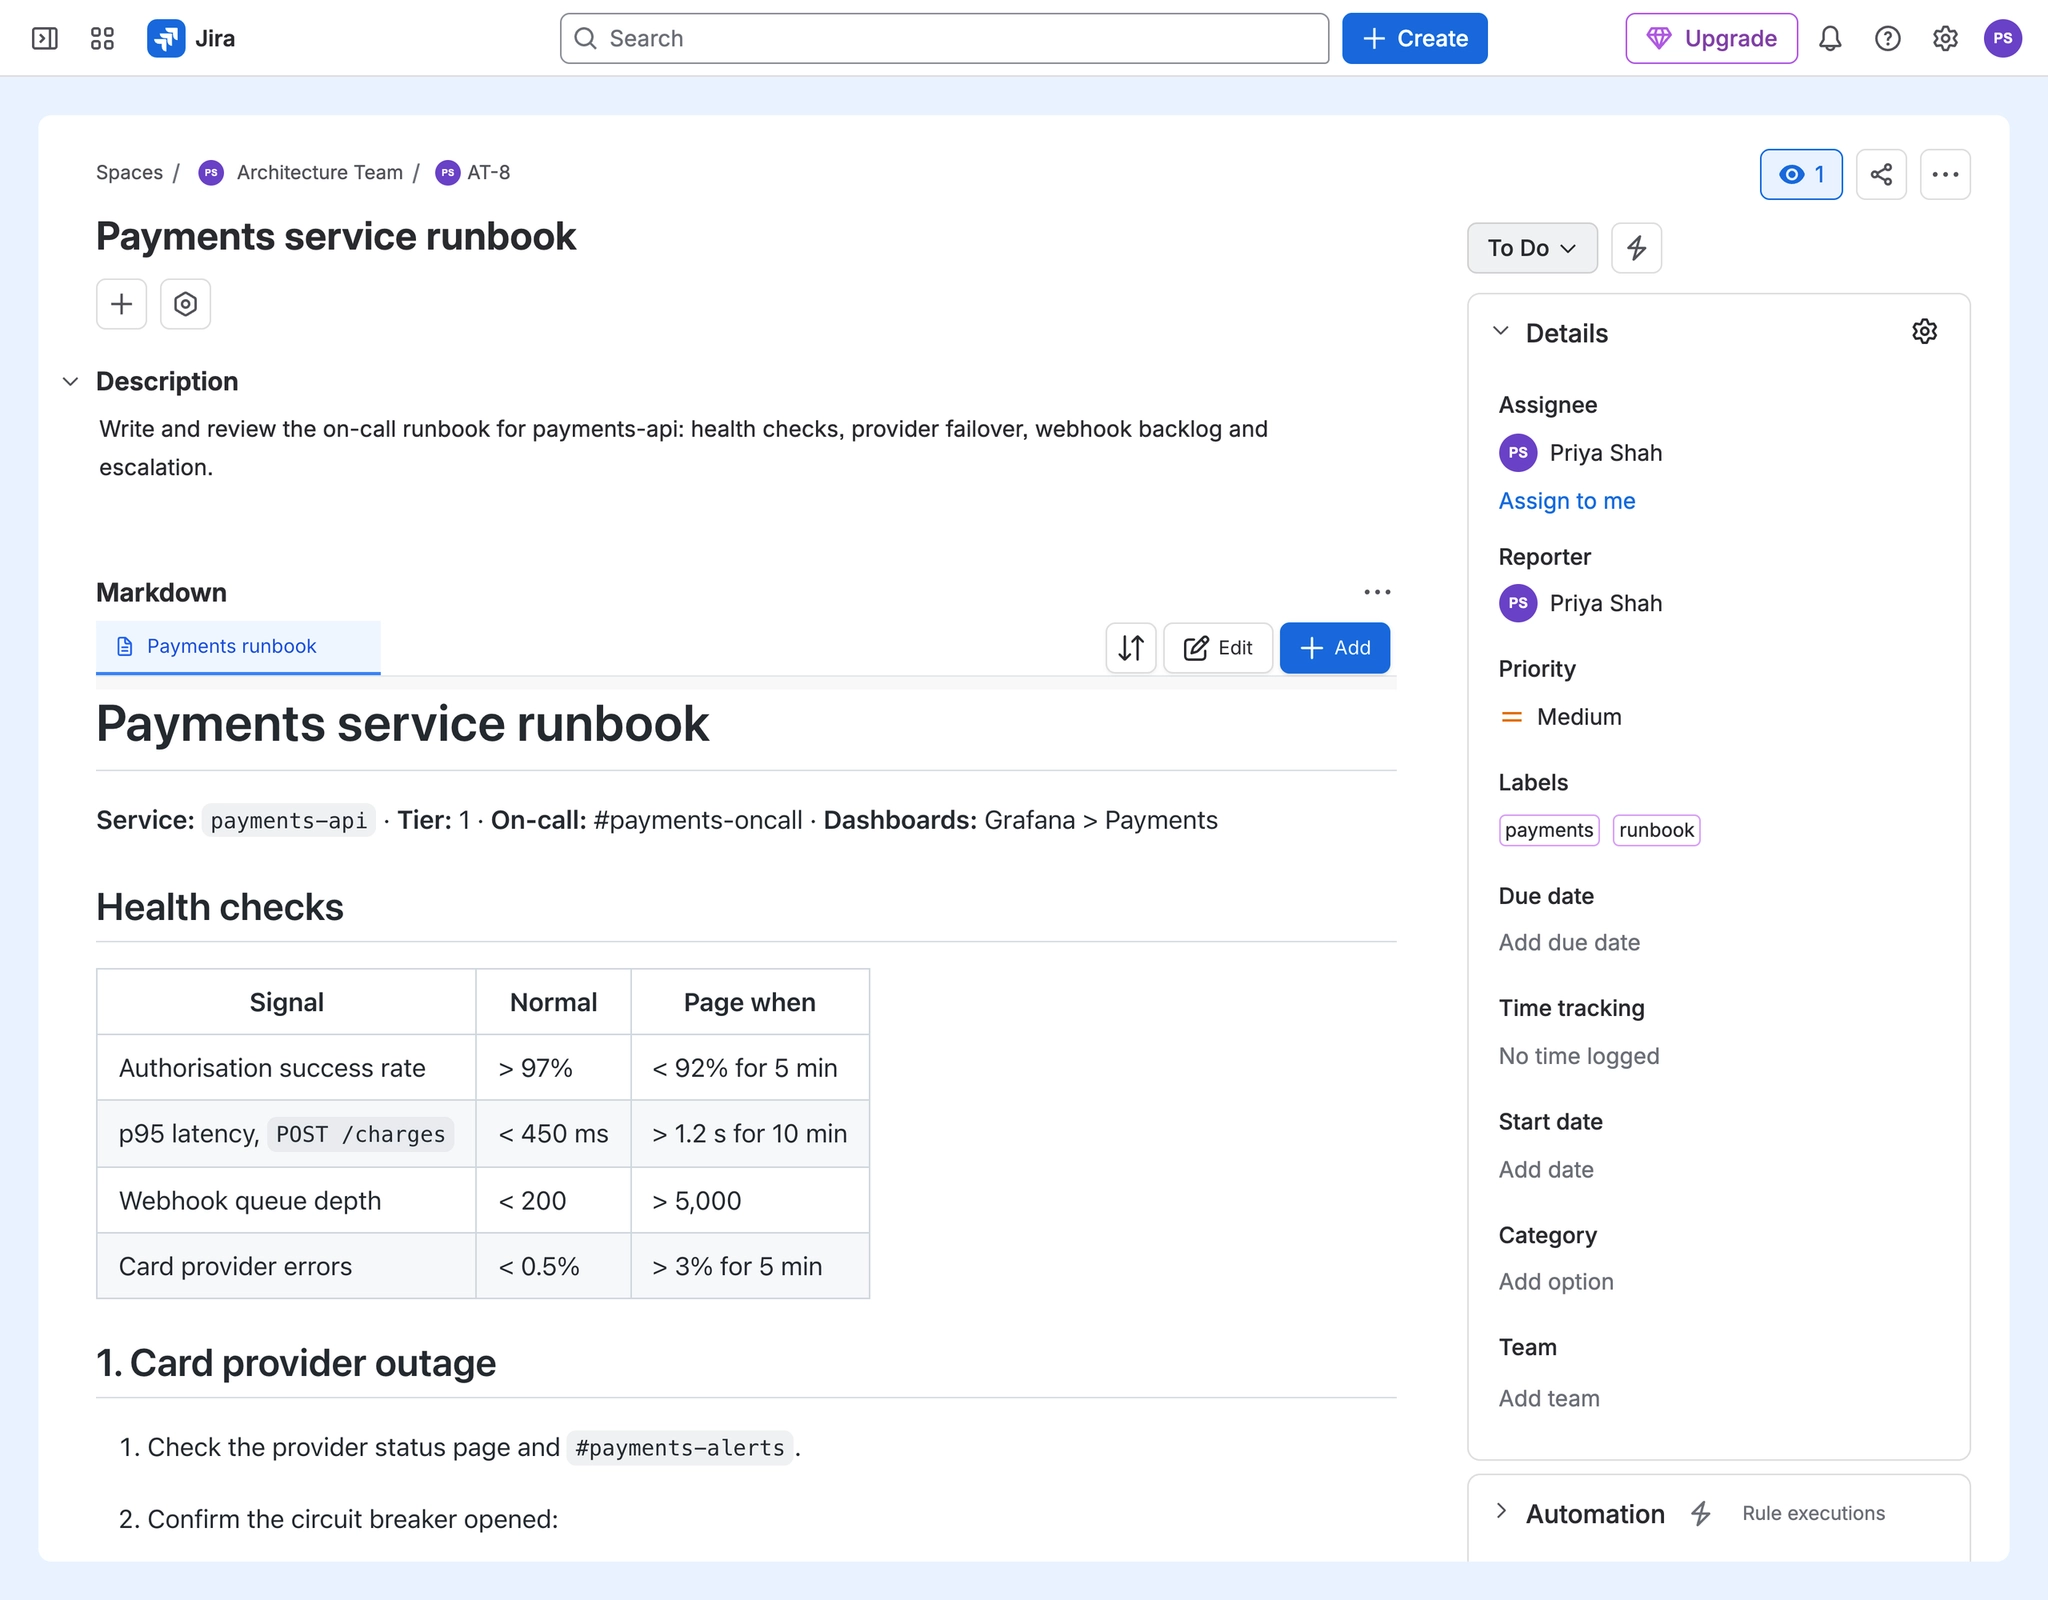
To use Markdown in a Jira issue, open the issue's Markdown panel and click Add. Give the document a Title, write Markdown in the editor while the preview updates beside it, and click Save. The document is stored as a .md attachment on the issue and appears as its own tab in the panel.
#Before you start
Capable Markdown for Jira must be installed on your Jira site.
You need to be logged in and allowed to add attachments to the issue.
#Steps
Open the issue. If the Markdown panel is not showing, click Markdown among the app buttons under the issue summary.
In the panel, click Add, or Add Markdown if the issue has no documents yet. The Add Markdown editor opens.
Type a Title. It becomes the name of the .md file.
Write your Markdown. The preview beside it shows how it will look.
Use the toolbar for formatting, and Insert to add a diagram or an image.
Click Save.
#What happens next
The document shows as a tab in the Markdown panel with a rendered preview, and as a .md file in the issue's attachments. Anyone who can see the issue can read it. Add as many documents as you like; extra tabs collapse into a More menu.
Images must be referenced by web address. The editor has no image upload, and relative paths from a repository do not resolve in Jira.
#Related
Proper documents, right on the issue.