
The six Attio setup steps in Jira
The wizard is a straight line and most of it is quick. What catches people is that three of the six answers own the ones below them, so a change of mind halfway through throws work away. Knowing which three is what saves you doing the Fields step twice.
A project that has not finished setup opens into these six steps. A project that has finished opens the same six sections as tabs, with the same controls and no step headings, Next button or step numbers.
#Getting around the wizard
The step rail runs across the top, a thin bar under it fills as steps are answered, and the footer counts "Step 1 of 6" through "Step 6 of 6". The bar fills on answers rather than on position, so ticking your first field on step 4 moves it straight away.
Steps unlock in order. A locked step shows a padlock and, on hover, says what to finish first: "Connect an Attio API key first.", "Choose an Attio object first.", "Choose the attribute to match on first." and "Choose at least one attribute to show first." Steps you have already answered can be jumped back to from the rail.
The footer carries Back, disabled on the first step, and a primary button reading "Next" on steps 1 to 5 and "Finish setup" on the last. There is no Cancel button during first-time setup, and there is no Save button anywhere in it.
#Step 1, Connect
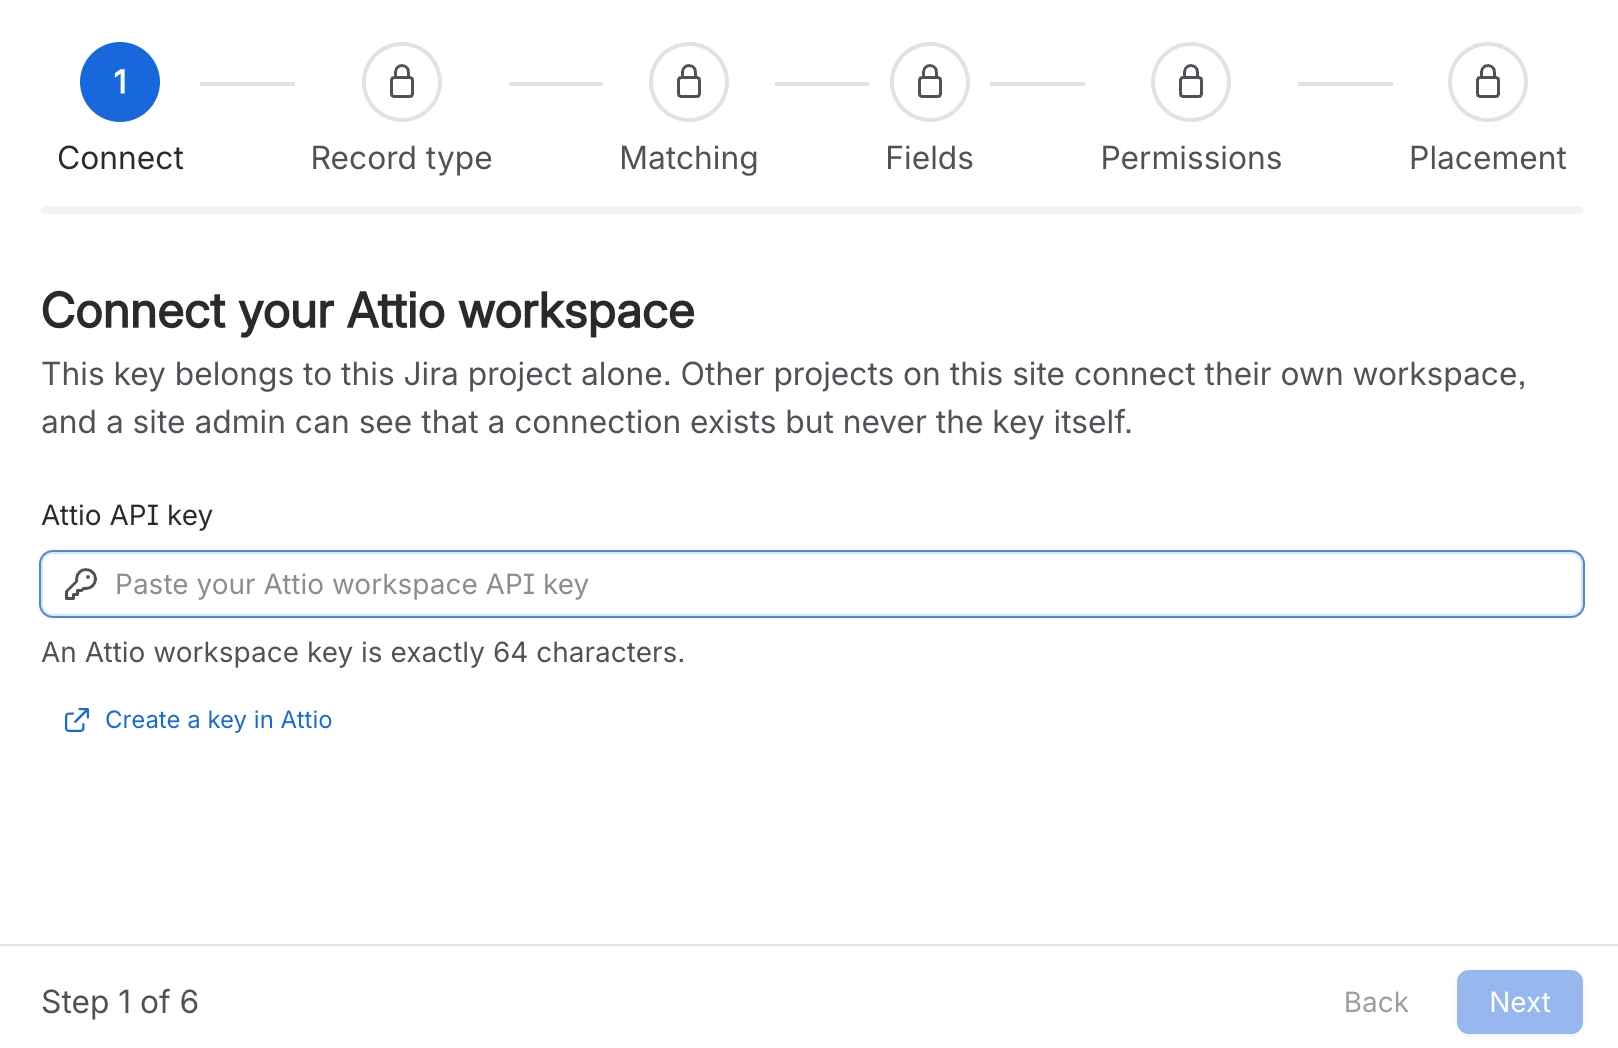
One field, under the heading "Connect your Attio workspace" and the line "This key belongs to this Jira project alone. Other projects on this site connect their own workspace, and a site admin can see that a connection exists but never the key itself."
Pressing Next tests the key, stores it if Attio accepts it, and moves on. On success a green panel names the workspace, says "The key is stored for this project." and adds "Taking you to the next step." That pause is deliberate: the workspace name is the one fact proving the key belongs to the workspace you meant, and it needs to be readable before the screen changes under you.
#Step 2, Record type
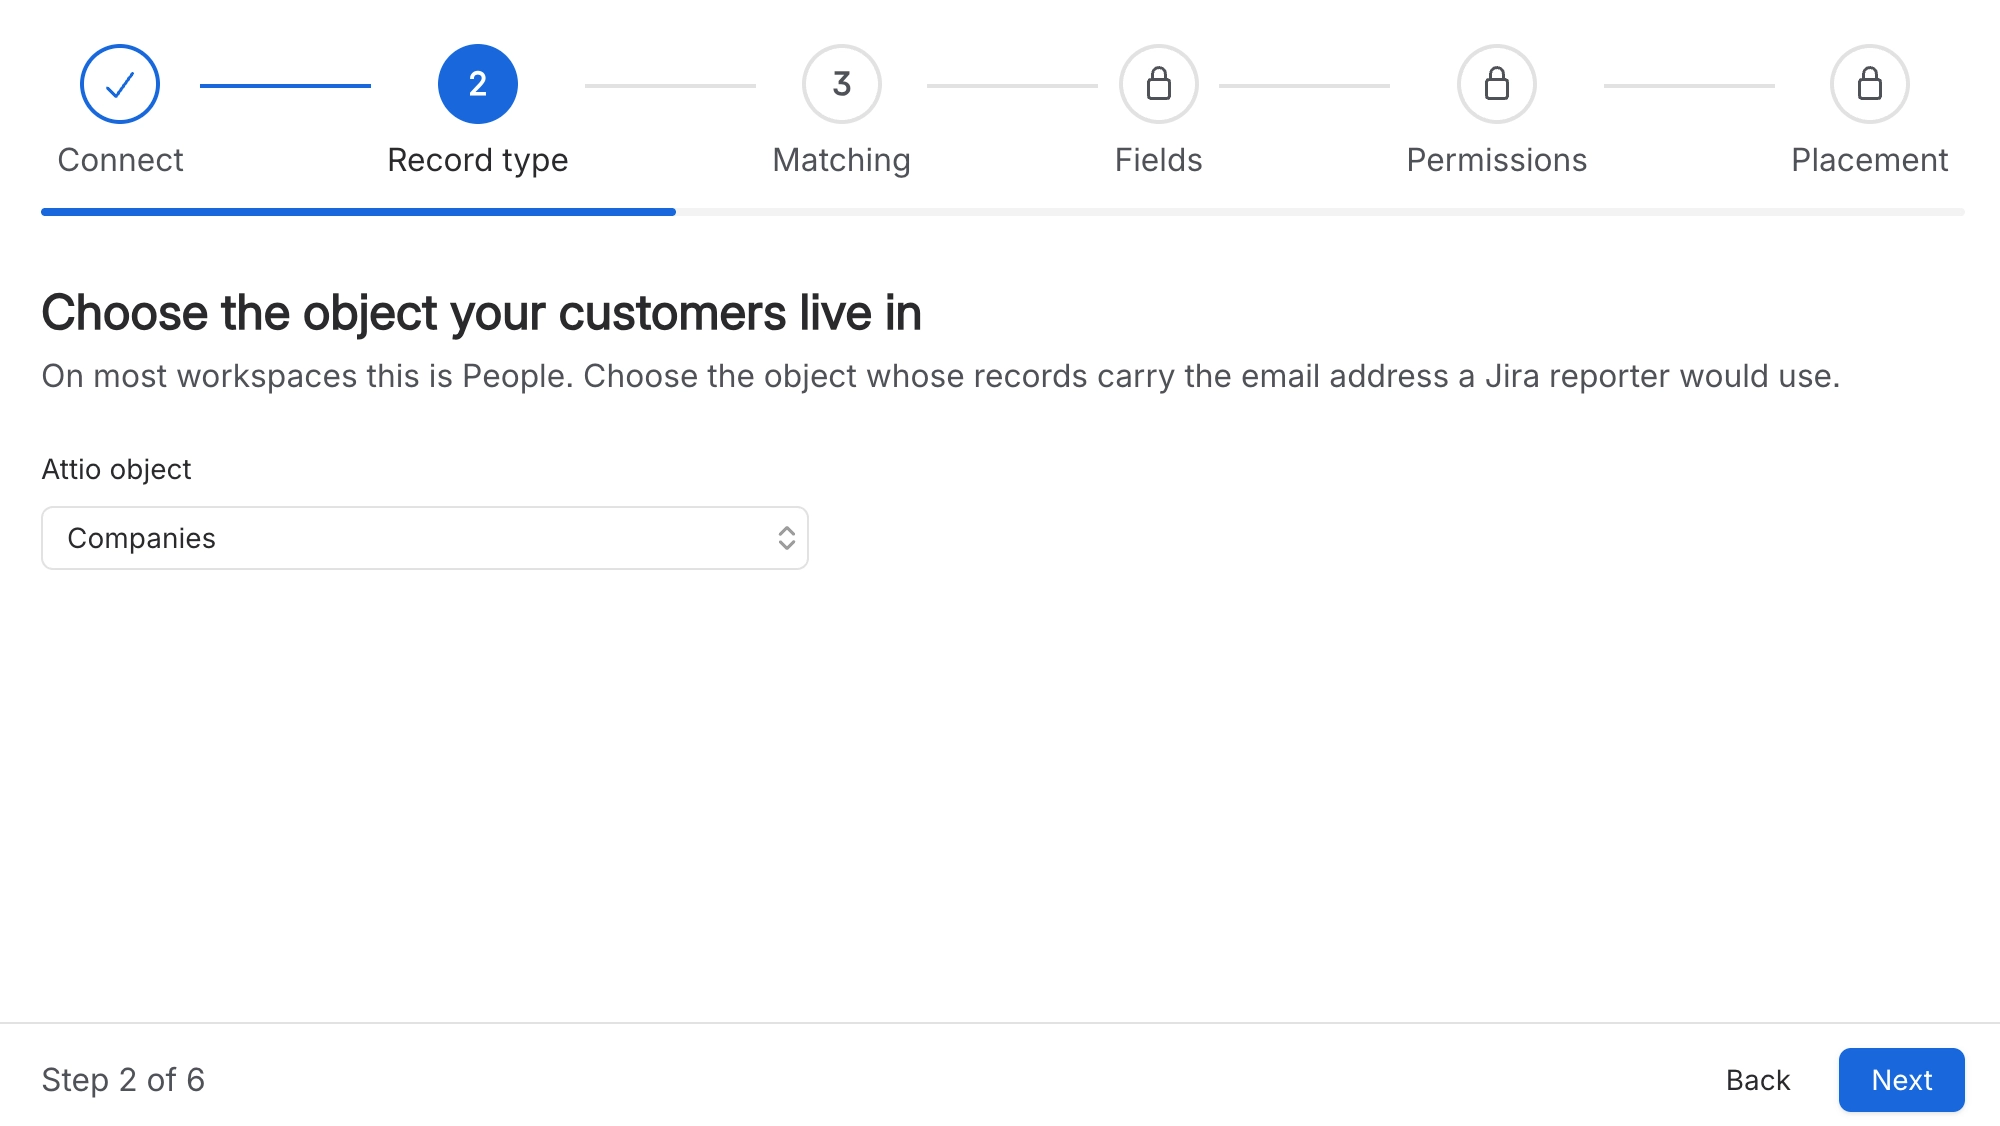
One dropdown, under the heading "Choose the object your customers live in". It lists the objects in the connected workspace, with Attio's standard objects sorted to the top and everything else following alphabetically. Attributes archived in Attio are never offered anywhere in setup, because an archived attribute can never receive a value again.
The advice above it changes with the matching method. Matching a person, it reads "On most workspaces this is People. Choose the object whose records carry the email address a Jira reporter would use." Matching a company, it reads "Usually Companies. Choose the object whose records carry the customer's domain rather than a person's address."
The list is read from Attio with the project's key, so it cannot load before a key is stored: the step shows "Connect a key first" and the dropdown is disabled. If the key is fine but the list comes back empty, the step says the key probably belongs to a workspace that has not been set up yet.
Changing the object throws away everything chosen under it. The attribute matched on, every field on the card, the linked record settings, the nested attributes and the picture settings all belong to the object they were chosen from. In the wizard, picking a different object clears them immediately with no confirmation. On the finished settings page the same change asks first, naming the object and the number of fields that will go, and it only asks when there is something to lose.
#Step 3, Matching
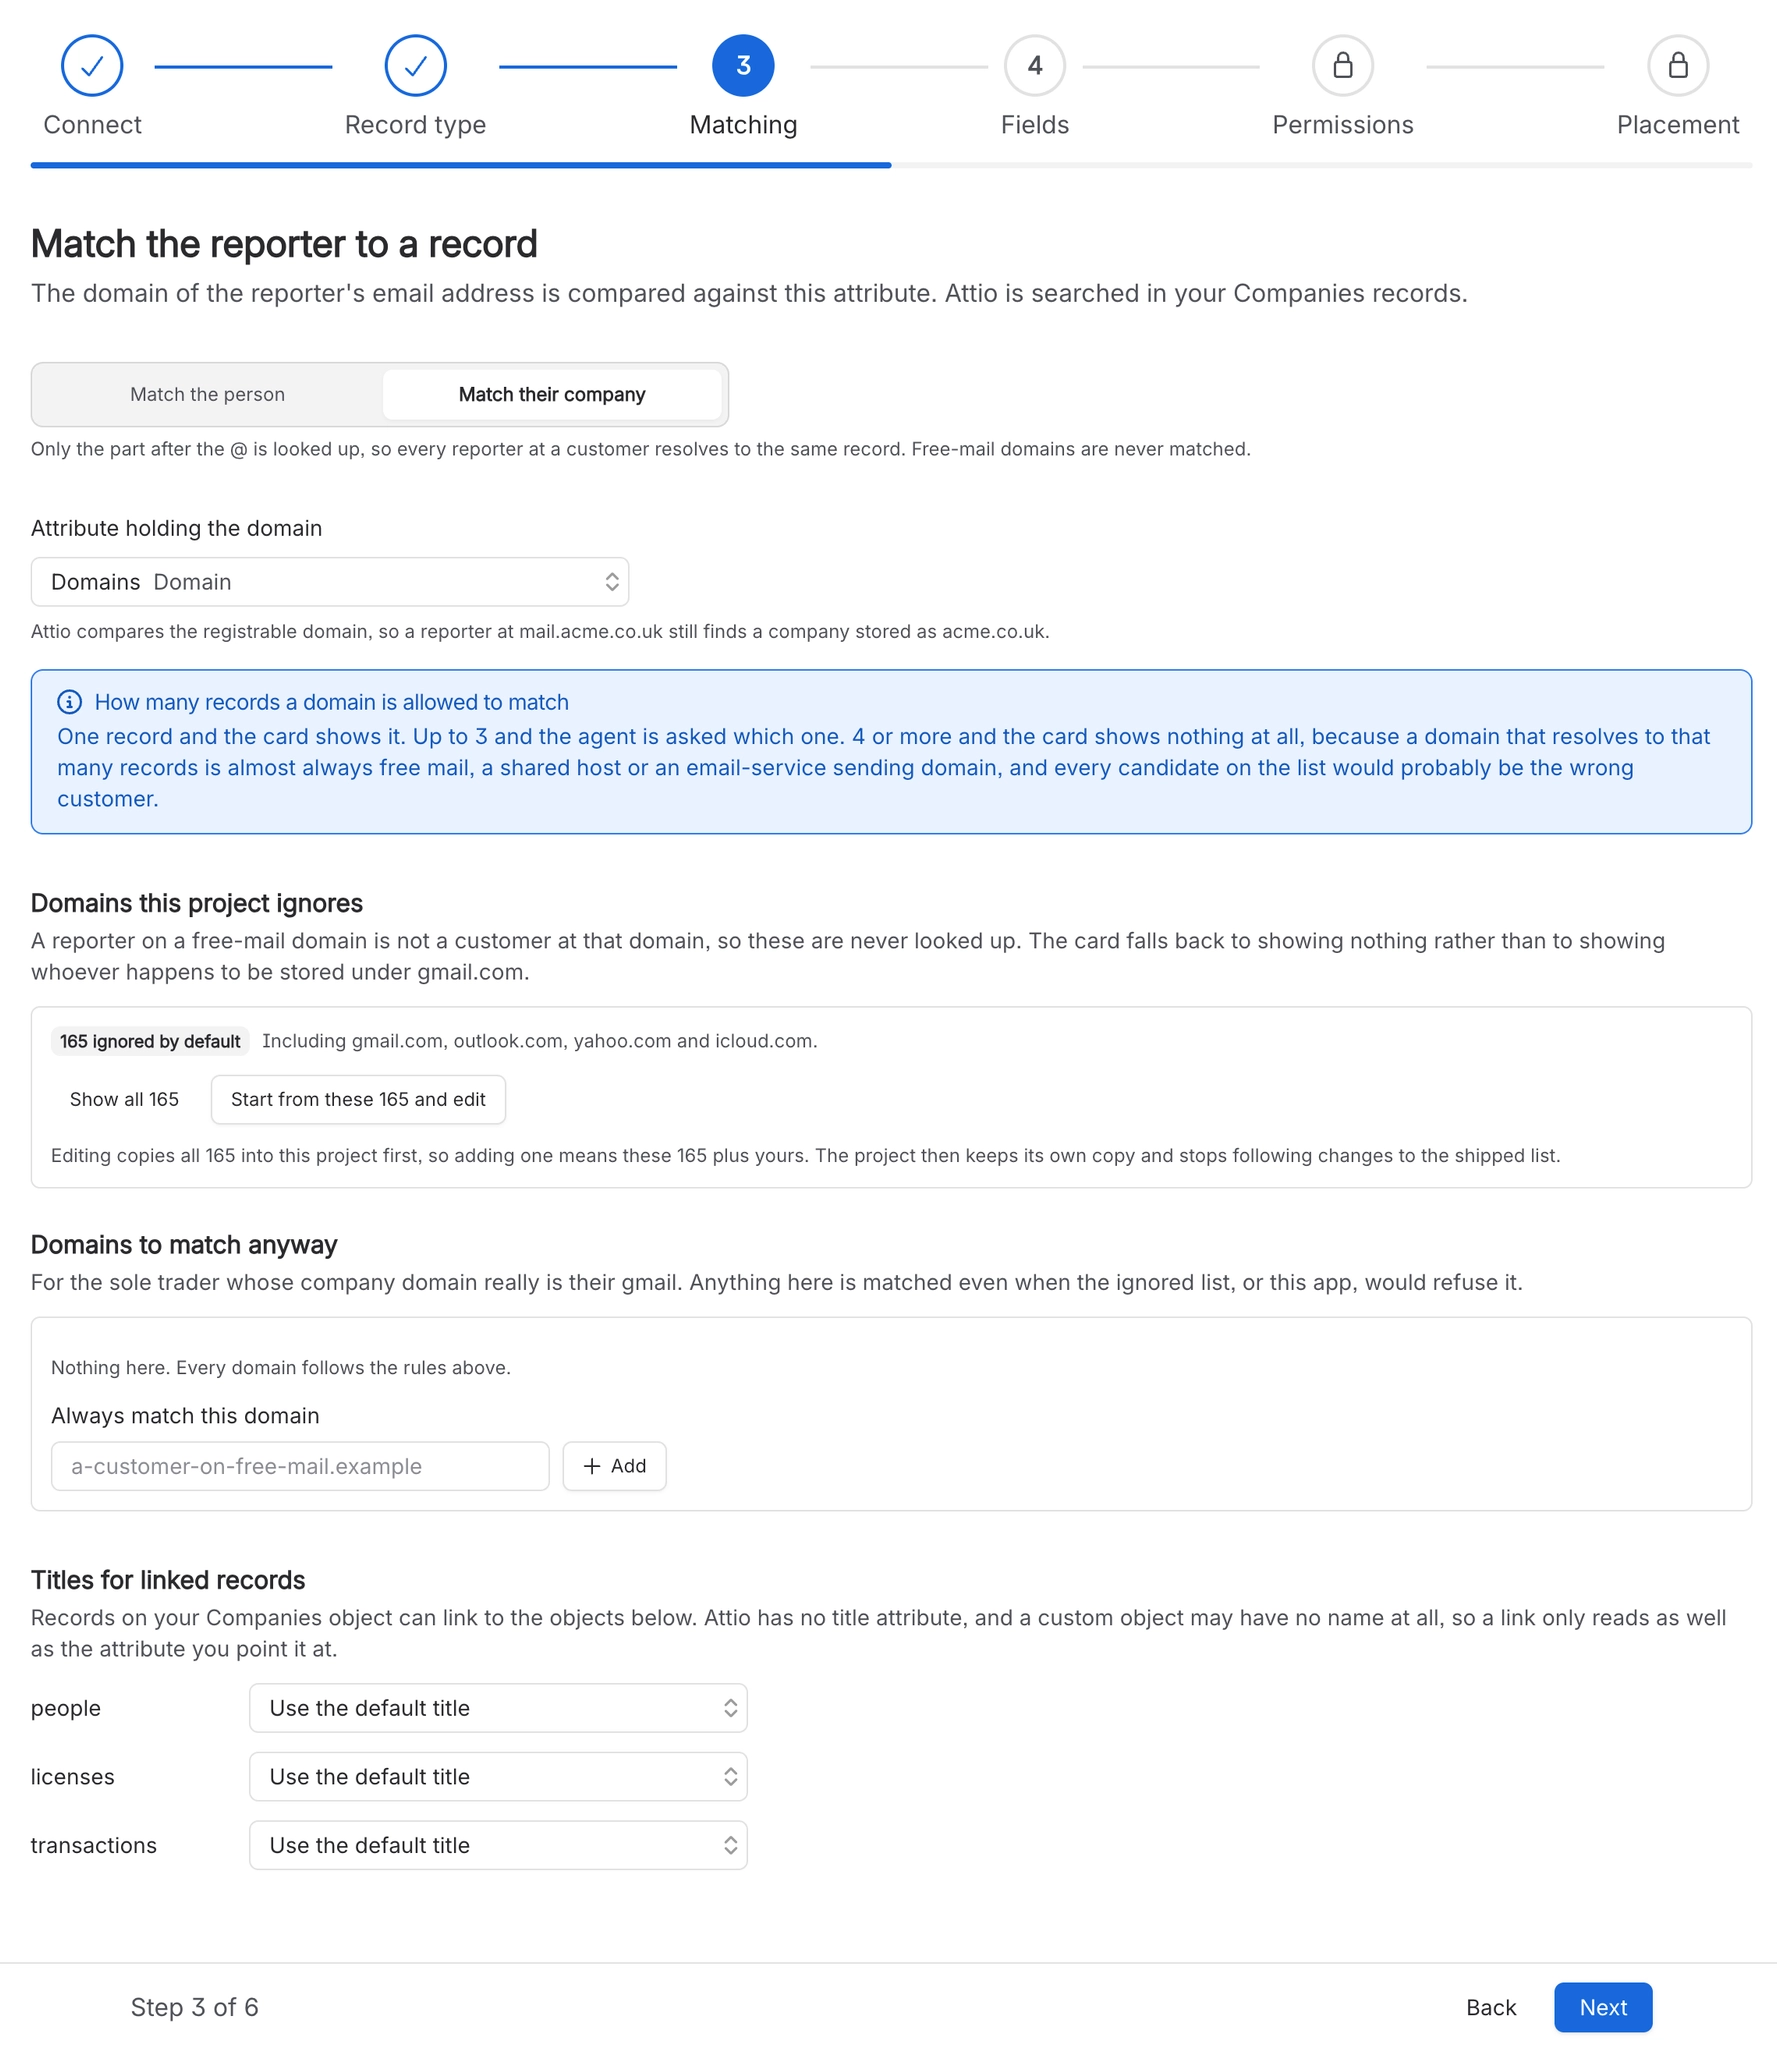
The heading reads "Match the reporter to a record". A two-segment control at the top chooses between "Match the person", where the reporter's own email address is looked up, and "Match their company", where only the part after the @ is used so that every reporter at a customer resolves to the same record.
Exactly one of them runs. There is no fallback in either direction: a project matching companies that finds nothing does not quietly show the person instead. The answer on the card is always about the thing the project was configured to look for.
Method | What is compared | Which attributes are offered |
|---|---|---|
Match the person | The reporter's whole email address, trimmed and lower-cased. | Email and Text. Domain attributes are deliberately excluded, because matching a person on a domain would resolve every colleague at a company to the same record. |
Match their company | Only the part after the @. | Domain and Text. Email attributes are excluded. Text is offered because many workspaces keep a domain in an ordinary text field. |
The app pre-selects the most likely attribute the first time the list arrives and never overwrites a choice you made by hand, though it does choose again if you change the matching method. Until a record type is chosen the picker is disabled, because attributes are read per object.
A Domain attribute and a Text attribute behave differently. The note under the picker says so: "Attio compares the registrable domain, so a reporter at mail.acme.co.uk still finds a company stored as acme.co.uk." A text attribute has no such handling and is compared whole, so only an exact match is found. It is the more brittle of the two.
Matching a person, the step also reports whether Attio enforces the chosen attribute as unique. Where it does not, it says so rather than pretending otherwise: "Attio does not enforce uniqueness on this attribute and there is no setting that changes that. When a reporter matches several records, the card lists them and lets the agent open the right one rather than guessing."
Matching a company, the step carries two editable domain lists, "Domains this project ignores" and "Domains to match anyway", and a panel stating how many records a domain is allowed to match. In person mode neither list is shown, because the domain is never looked at.
Switching the matching method clears more than the attribute. Changing between matching the person and matching their company also clears the record type, because the two usually need different objects, along with the attribute matched on, every field on the card and the picture settings. A confirmation names what will go, and confirming takes you back to the record type question. The two domain lists survive it.
#Step 4, Fields
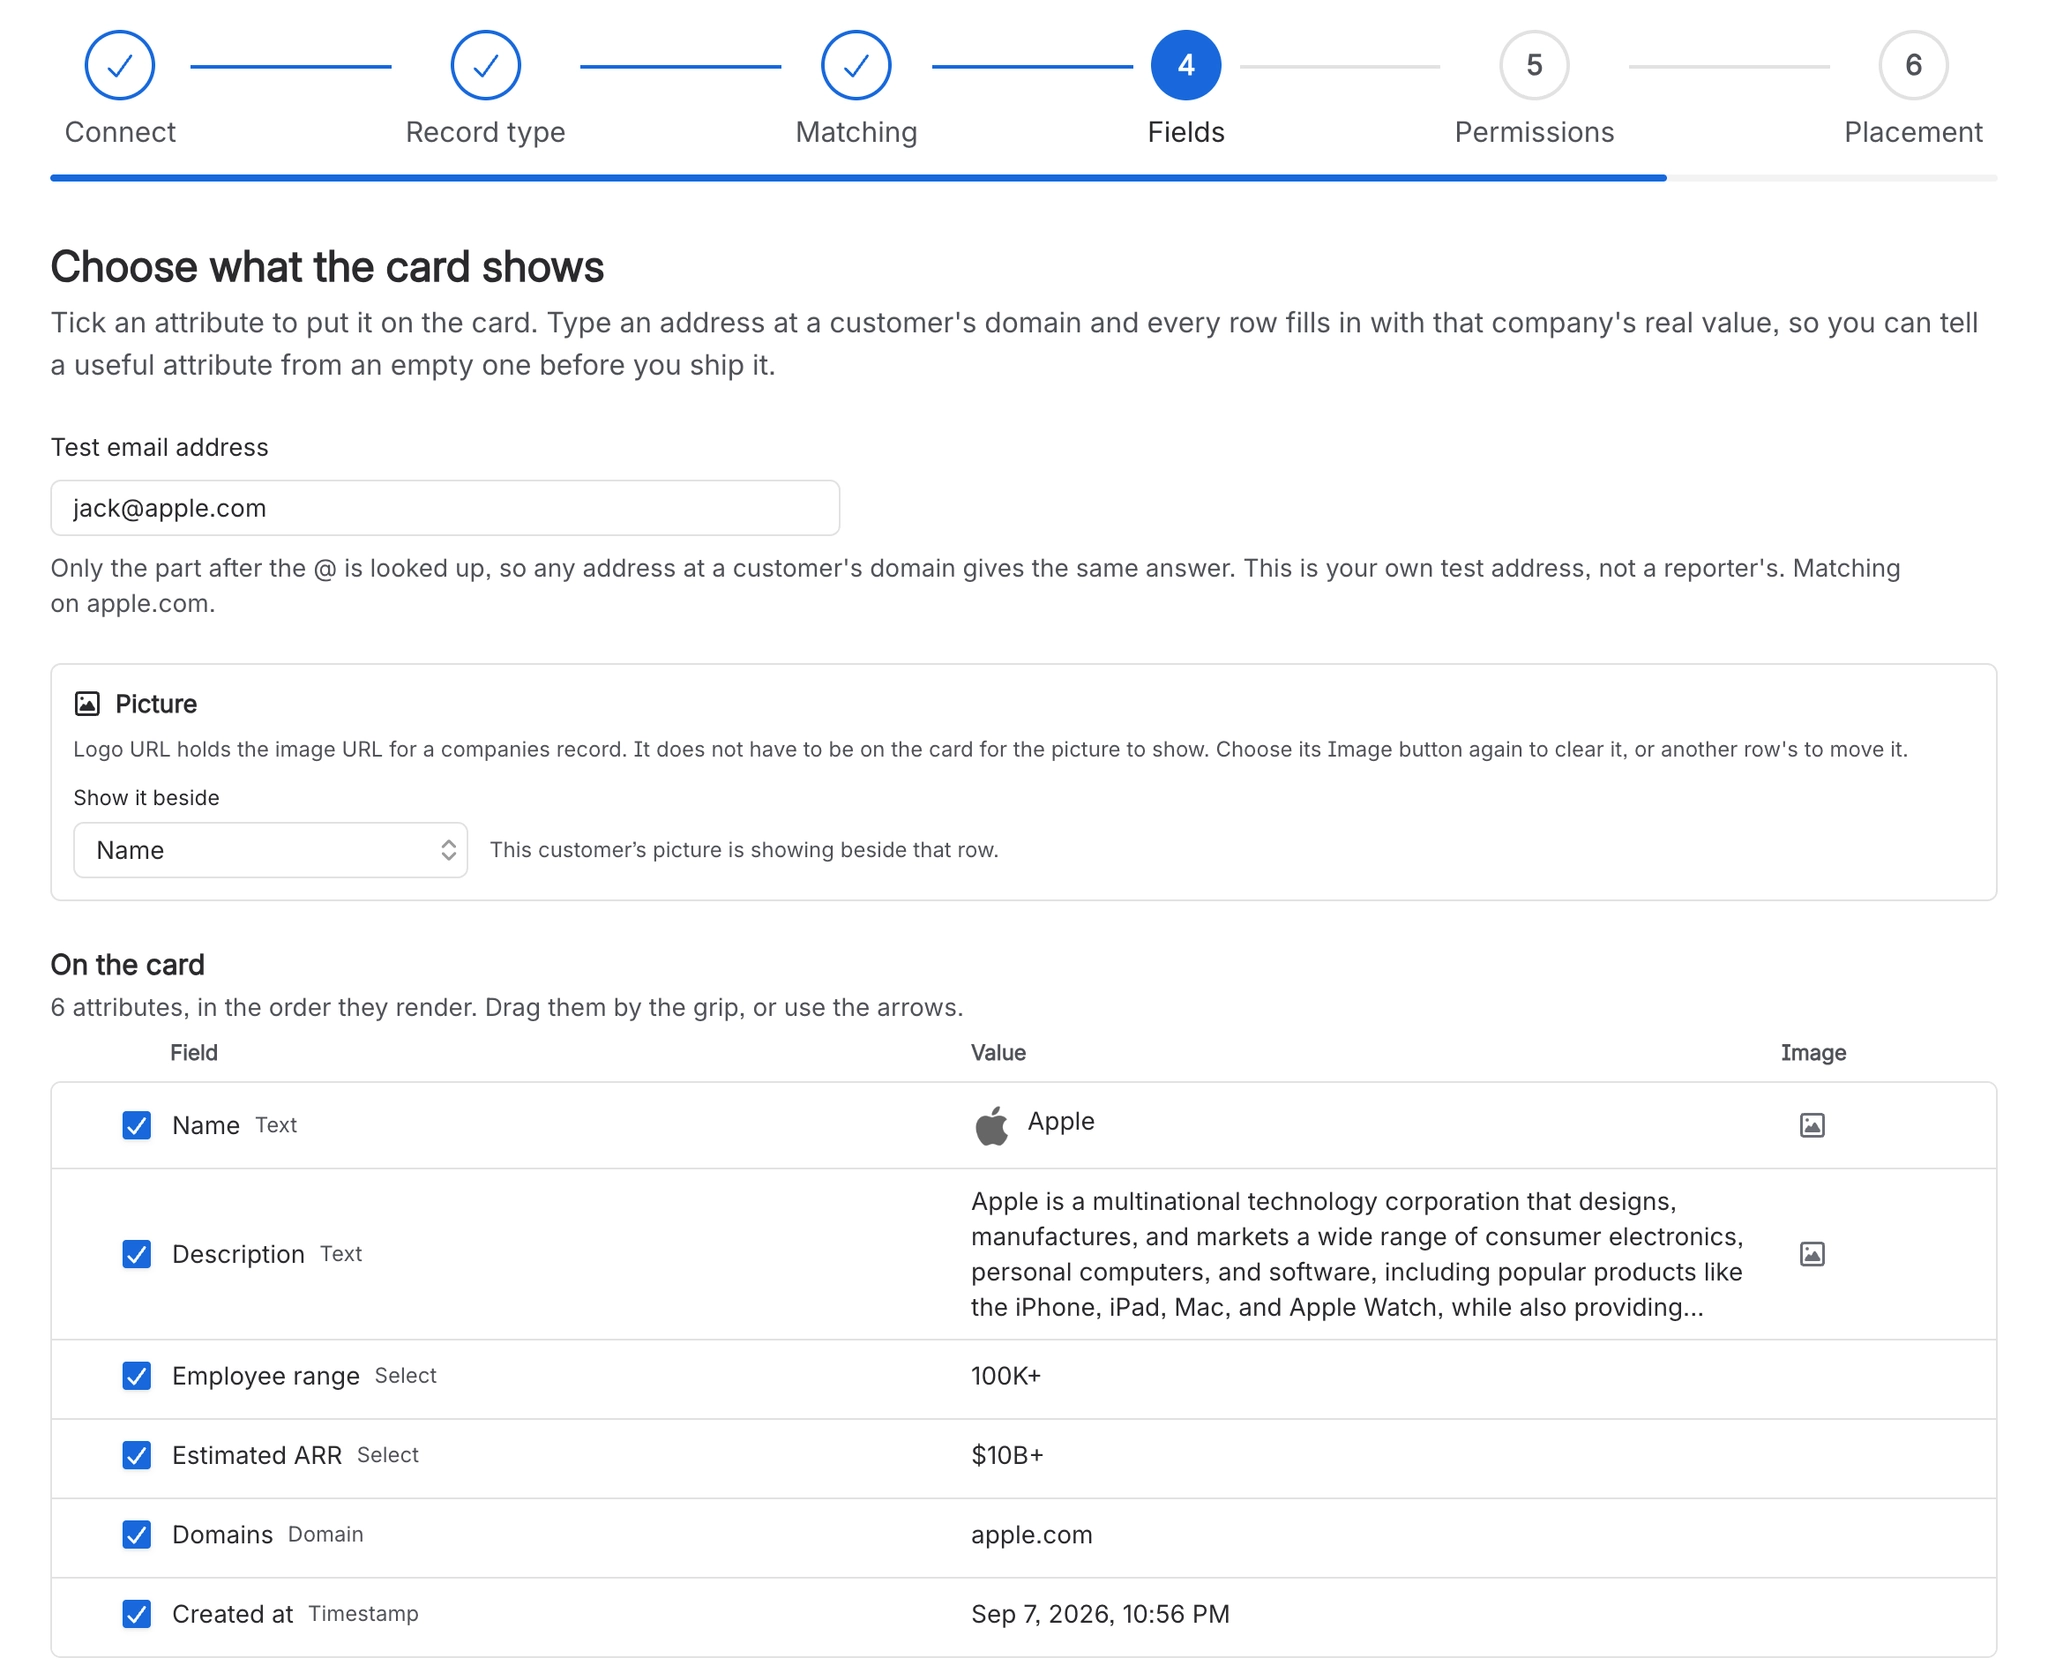
The heading reads "Choose what the card shows". Every attribute of the chosen object is a row: a tick box, its name, its type and what it actually holds for a test address you type. The rows are split into "On the card", in the order they will appear, and "Everything else". Ticking a row adds it to the bottom of the card.
The test address is your own, not a reporter's, and the screen says so: "Type an address that exists in your Attio workspace and every attribute below fills in with that customer's value. This is your own test address, not a reporter's." Values fill in for attributes you have not ticked as well, which is how you tell a useful attribute from an empty one before you ship it.
Nothing fills in until at least one attribute is ticked: "Tick one attribute and every row below fills in, including the ones you have not chosen. Attio is not looked up for a project with an empty card." The lookup then waits about six tenths of a second after you stop typing, so a burst of edits costs one lookup rather than one each.
Order is set by dragging the grip or by the move up and move down buttons on each row. The buttons are always available, including from the keyboard, and every completed move is announced with the position the row landed in.
There is no preview of the finished card on this screen. What you get instead is the real value beside each attribute row, plus a small linked record card and the customer's picture inside the value column.
The picture is two separate choices. An Image button on the right of a row nominates that attribute as the record's picture. A "Show it beside" dropdown then says which row on the card the picture sits next to, because the card has no heading for it to sit in. The nominated attribute does not have to be on the card, which is how you get the picture without a row full of a machine address. Only one attribute per object can hold it, so nominating one silently un-nominates whichever held it before.
#Step 5, Permissions
The heading reads "Choose who can see the card" and the description is the whole point of the step: "Everyone who passes this gate sees every attribute you chose on the previous step. Nothing on the card is hidden per person." A warning above the options counts the attributes the gate is protecting.
Being able to open the issue as yourself is the floor and cannot be configured away. What this step sets is how much narrower than that floor the audience is.
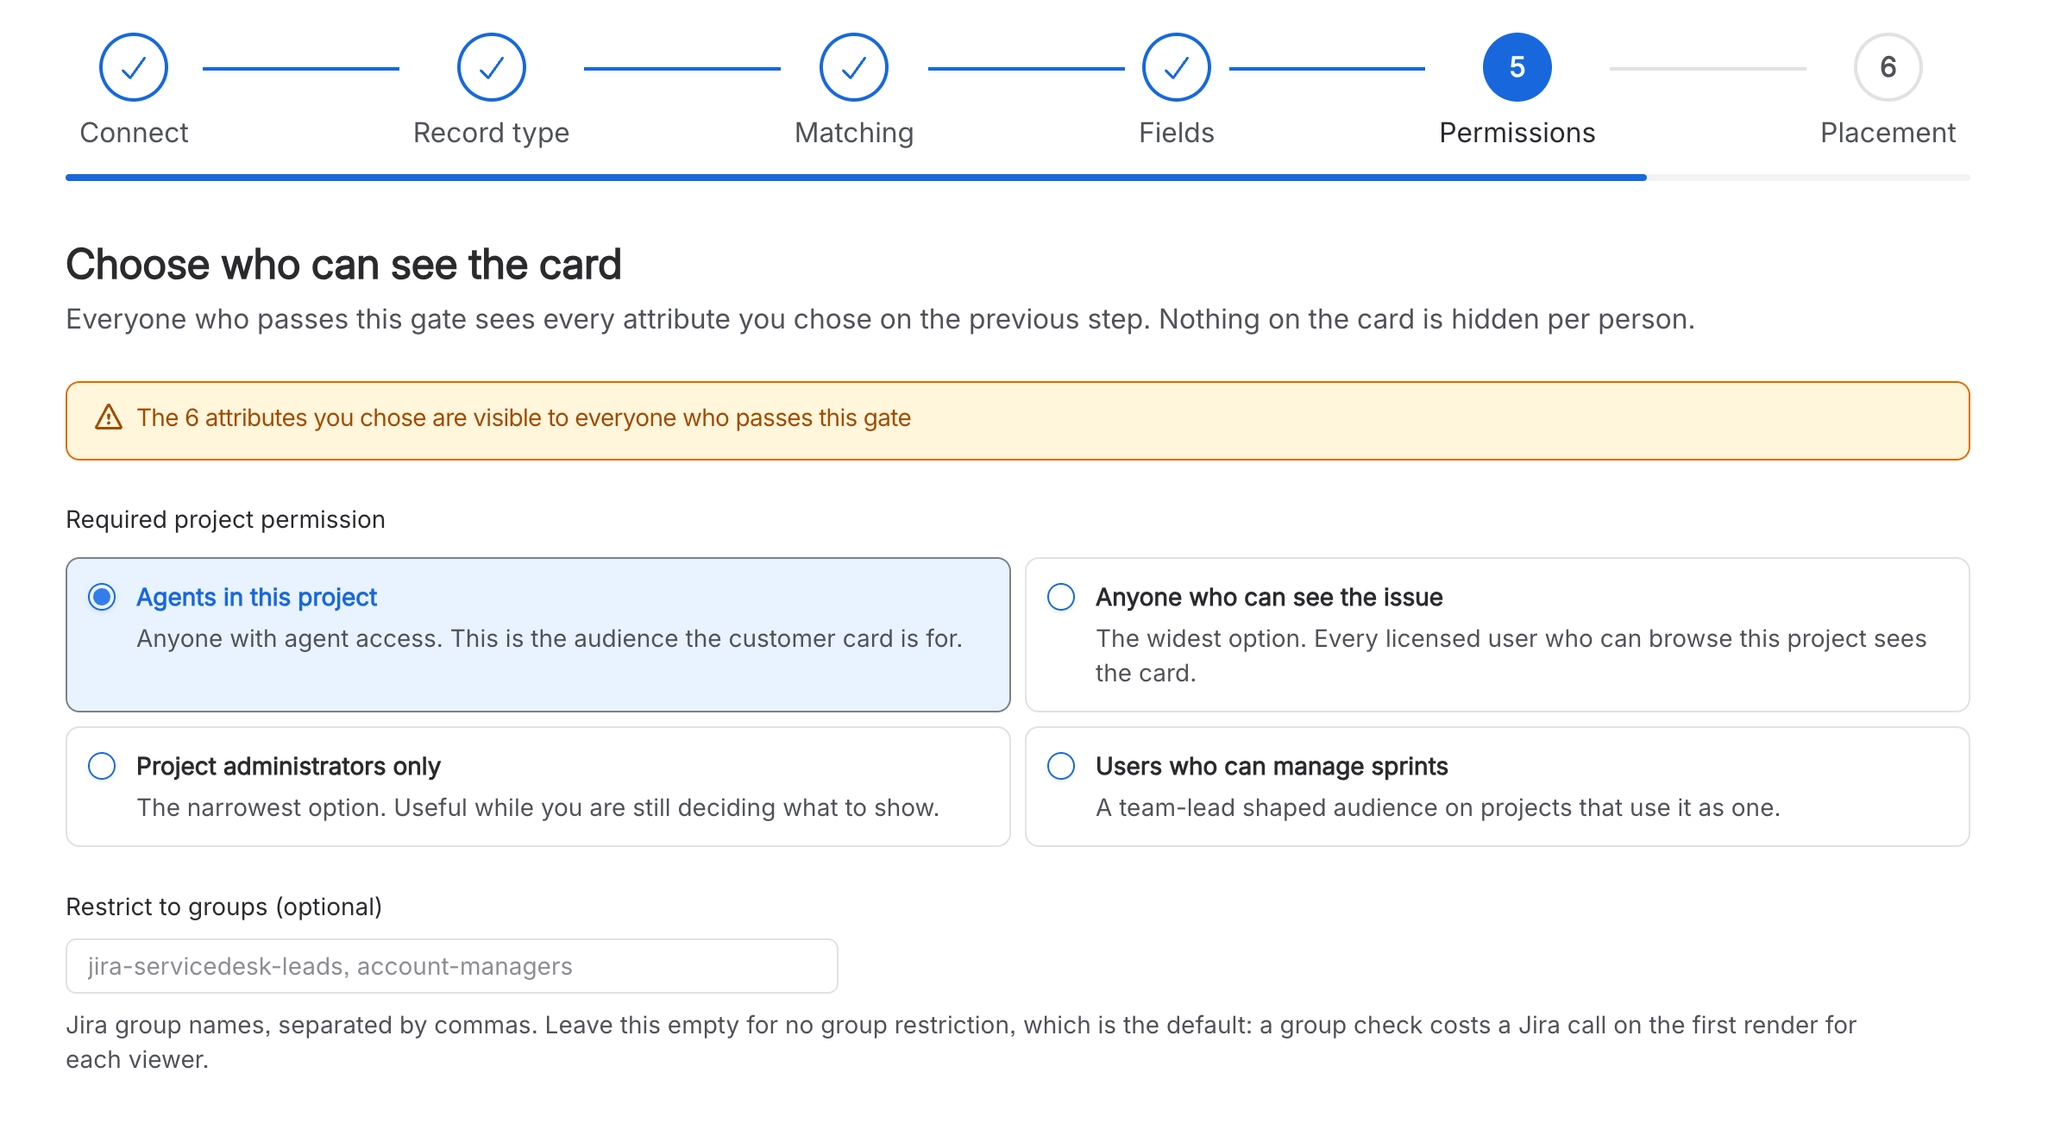
Option | The hint shown beside it |
|---|---|
Agents in this project (the default) | Anyone with agent access. This is the audience the customer card is for. |
Anyone who can see the issue | The widest option. Every licensed user who can browse this project sees the card. |
Project administrators only | The narrowest option. Useful while you are still deciding what to show. |
Users who can manage sprints | A team-lead shaped audience on projects that use it as one. |
The widest option is not as wide as its hint sounds. All three card placements are offered only to signed-in viewers with service management agent access, on a service desk project. The audience setting narrows that and cannot widen it, so "Anyone who can see the issue" does not in practice reach a licensed user without agent access, and it never reaches a portal customer.
"Restrict to groups (optional)" takes Jira group names separated by commas, and the helper text explains why it is empty by default: "Jira group names, separated by commas. Leave this empty for no group restriction, which is the default: a group check costs a Jira call on the first render for each viewer." When groups are named, a viewer needs the chosen permission AND membership of one of them. Both, not either.
A misspelled group name hides the card from everybody. Group names are compared ignoring capitalisation and surrounding spaces, but nothing checks that the group exists in Jira. A name with a typo in it matches nobody, which silently takes the card away from every viewer in the project, with no error on any screen.
Because the step ships with a default it can never block you: Next is available as soon as at least one field has been chosen. The step exists to make somebody look at the setting rather than to collect a missing answer.
#Step 6, Placement
The heading reads "Choose where the card appears", with the line "Pick at least one. Finishing setup is what turns the card on for everyone in this project, and you can change this later without going through setup again." Each option is drawn as a small sketch of a Jira issue with the region highlighted and labelled, so the three names do not have to be recognised from words alone.
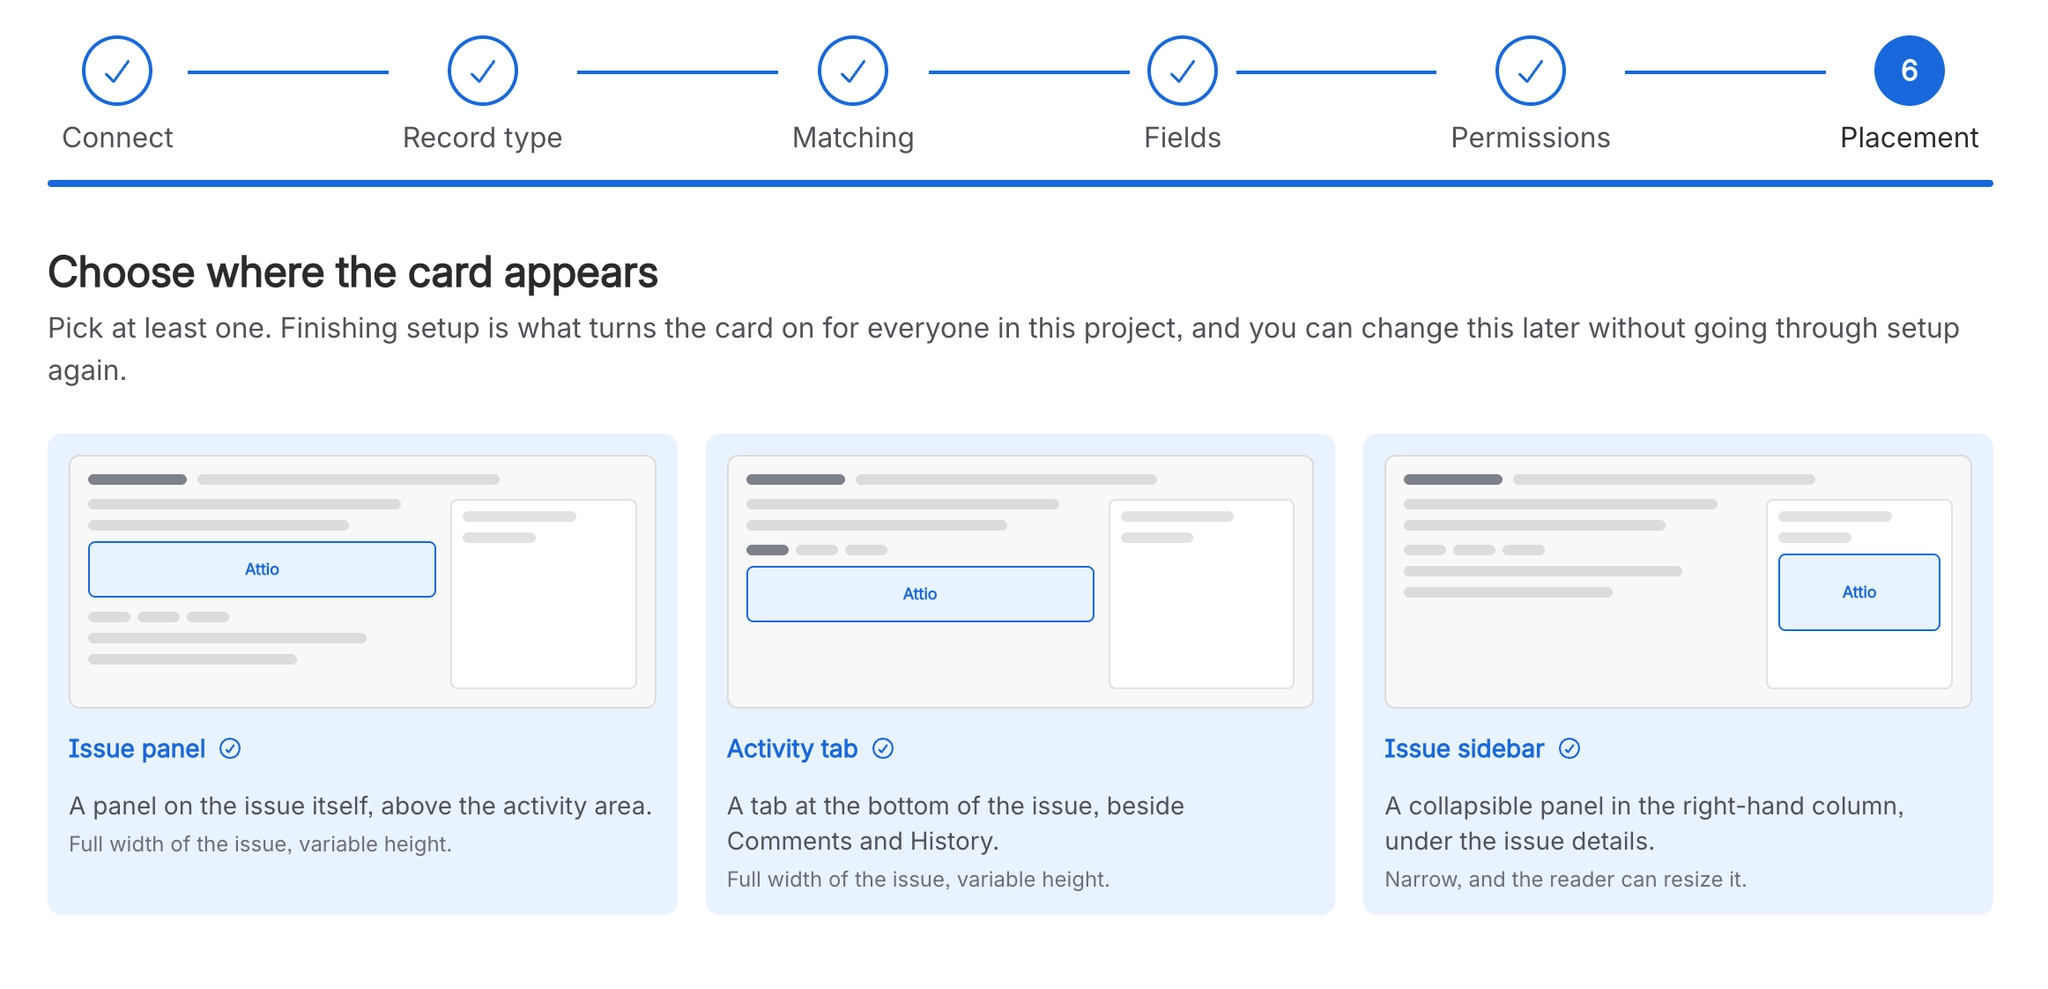
Placement | Where it is | Shape |
|---|---|---|
Issue panel | A panel on the issue itself, above the activity area. | Full width of the issue, variable height. |
Activity tab | A tab at the bottom of the issue, beside Comments and History. | Full width of the issue, variable height. |
Issue sidebar | A collapsible panel in the right-hand column, under the issue details. | Narrow, and the reader can resize it. |
They are independent toggles rather than a choice of one, so a project can use two or all three. A common pairing is the sidebar for a glance and the activity tab for the detail. All three show exactly the same card with the same information: the only difference is the width the card is given, and it lays itself out to whatever that turns out to be.
With none selected, the step shows "Choose at least one place" and warns "Until one of these is on, the card renders nowhere, including for you.", and "Finish setup" is unavailable. A placement ticked during setup is held until Finish setup is pressed, so going back to change an earlier answer cannot switch the card on as a side effect.
#After you finish
The page becomes a tab strip with the same six sections: Connection, Record type, Matching, Fields, Permissions, Placement. Above them the header states the live facts, for example "Shown on Issue panel and Activity tab, to agents in this project.", read from what is stored rather than from whatever you have half-edited.
On the settings page nothing saves until "Save changes" is pressed. A bar at the foot of the page names what changed, for example "Unsaved changes to fields.", and sticks to the bottom of the window so it can be reached from anywhere in a long tab. A save carries only the settings that actually changed, so two administrators editing different tabs collide only on what they each touched.
Two things never go through that bar: the API key, which has its own test and save, and the placements, which apply the moment they are toggled. The tab description says so: "Where on the issue the card appears. Changes here take effect immediately."
#A few things worth knowing
Toggling a placement on the settings page writes immediately and then re-reads the whole configuration, which replaces anything still sitting unsaved on the other tabs. Save your work before you touch placements.
Typing a test address on the Fields tab also commits your pending changes, because the values are looked up against the stored configuration rather than the one on screen. The save bar is still on screen while that happens, so the write passes unnoticed.
Changing the record type, or switching between matching the person and matching their company, clears the fields you chose. The Fields step is genuinely the last thing to settle, and doing it before those two questions are answered means doing it twice.
#Related
Three of the six answers own the ones after them.