Set up board workflow
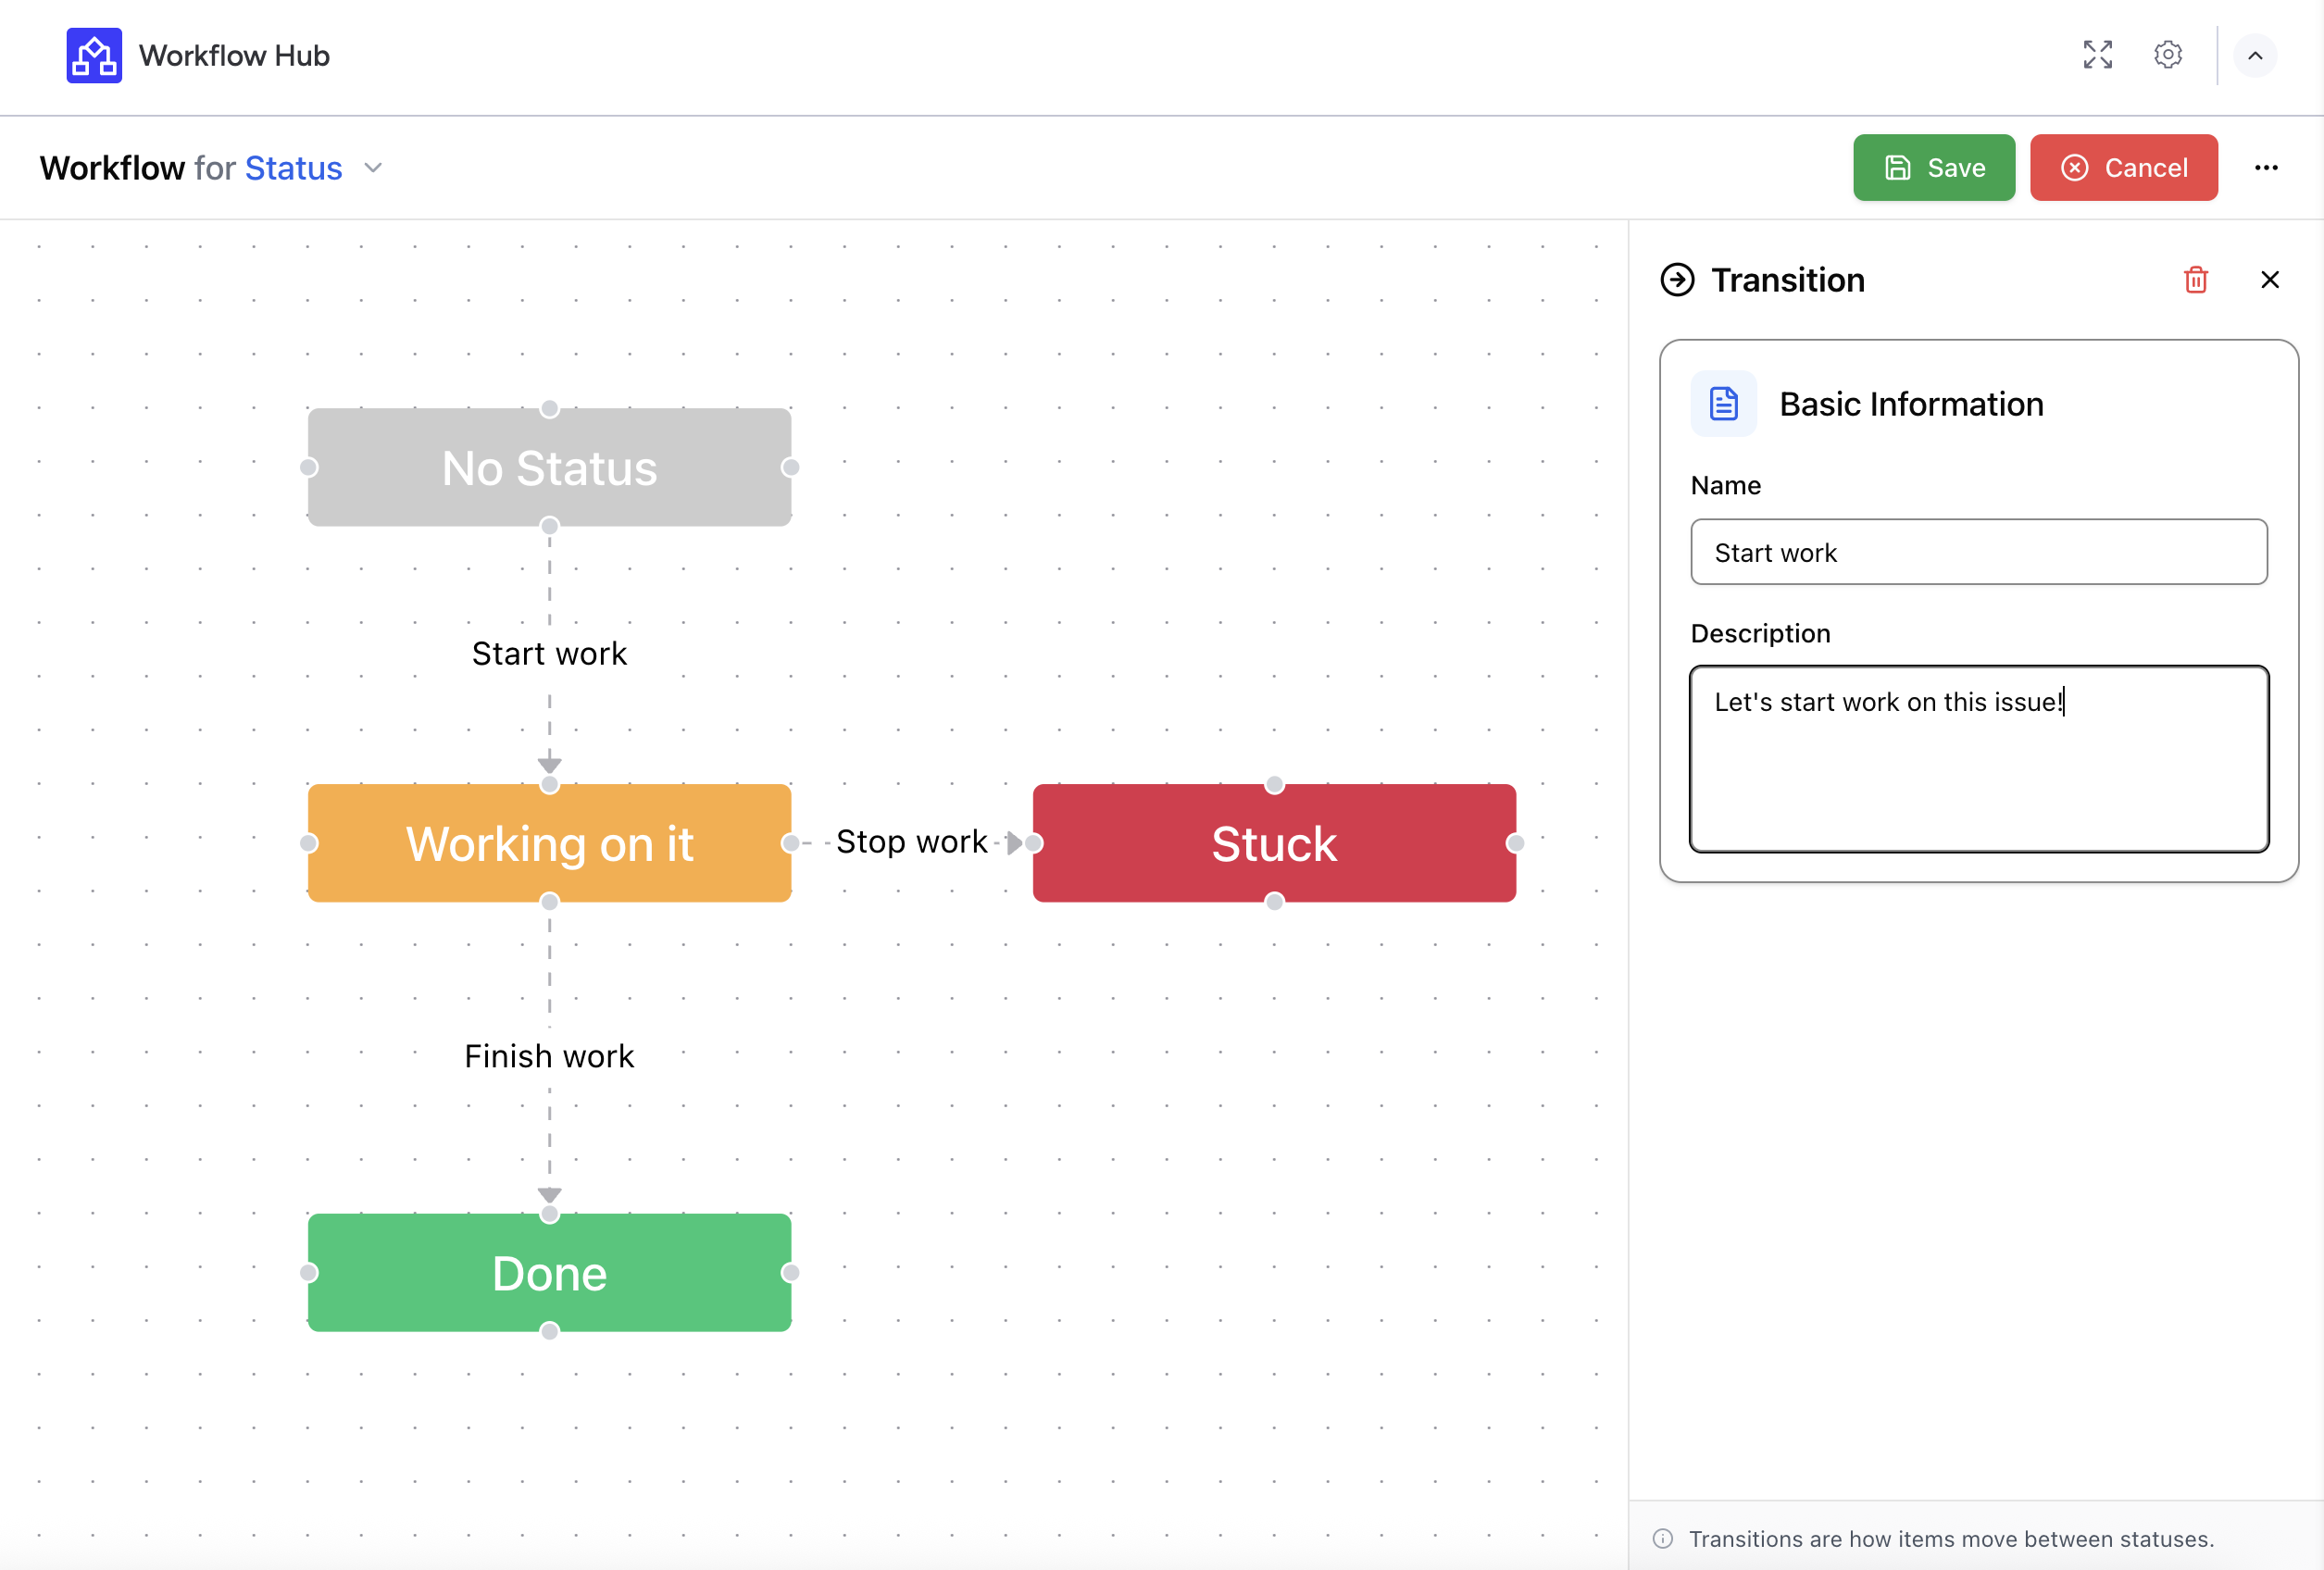
Now that your status column is in place, you’re ready to design your workflow in the Workflow Hub Board View. This view allows you to visually map out how items progress through different stages of your process. Here’s how to do it:
Open the Board View:
Go to the board where you installed Workflow Hub.
Click on “+ Add View” and select “Workflow Hub” under the available apps.
Click “Edit Workflow” to begin designing your process:
Select the status column you want to use for this workflow. Only one status column can be active per workflow.
Create transitions between statuses by clicking on a status and dragging to another. This creates a directional arrow representing the allowed path between stages.
Name each transition – These names appear on the arrows and clarify the action, such as “Start Review,” “Send to QA,” or “Mark as Done.”
Organize your flow:
You can drag and drop status nodes to rearrange them visually.
Avoid unnecessary loops unless they reflect real-world backtracking.
Use naming conventions that match team vocabulary for clarity.
Save your workflow – Once all transitions are set and the layout looks clean, click Save. The app will now use this map to guide how items move through statuses.
This board-level workflow provides a visual framework for your process, allowing everyone to see and understand how tasks should progress.

