Workflow Hub for monday.com Home
Welcome to the documentation for the Workflow Hub app for monday.com!
We love monday.com for managing our tasks. Its easy-to-use interface and extensibility make it one of the best tools out there for teams of all sizes. But one thing we always felt was missing was a visual workflow solution — something that makes it easier to process items in a clear, structured, and intuitive way.
That’s where Workflow Hub comes in.
Workflow Hub allows you to create visual workflows using any Status column on your monday board. You can define statuses as steps in your workflow and add custom transitions between them. Once your workflow is set up, you can open an item and instantly see the available paths it can take based on your defined flow.
This makes signposting tasks a breeze — no more guessing or manually managing confusing status jumps. Whether you're managing projects, handling support tickets, or onboarding new team members, Workflow Hub brings structure and clarity to your process.
Start building better workflows today, right inside the monday.com interface you already know and love!
Guide
Step 1 - Set up your Board
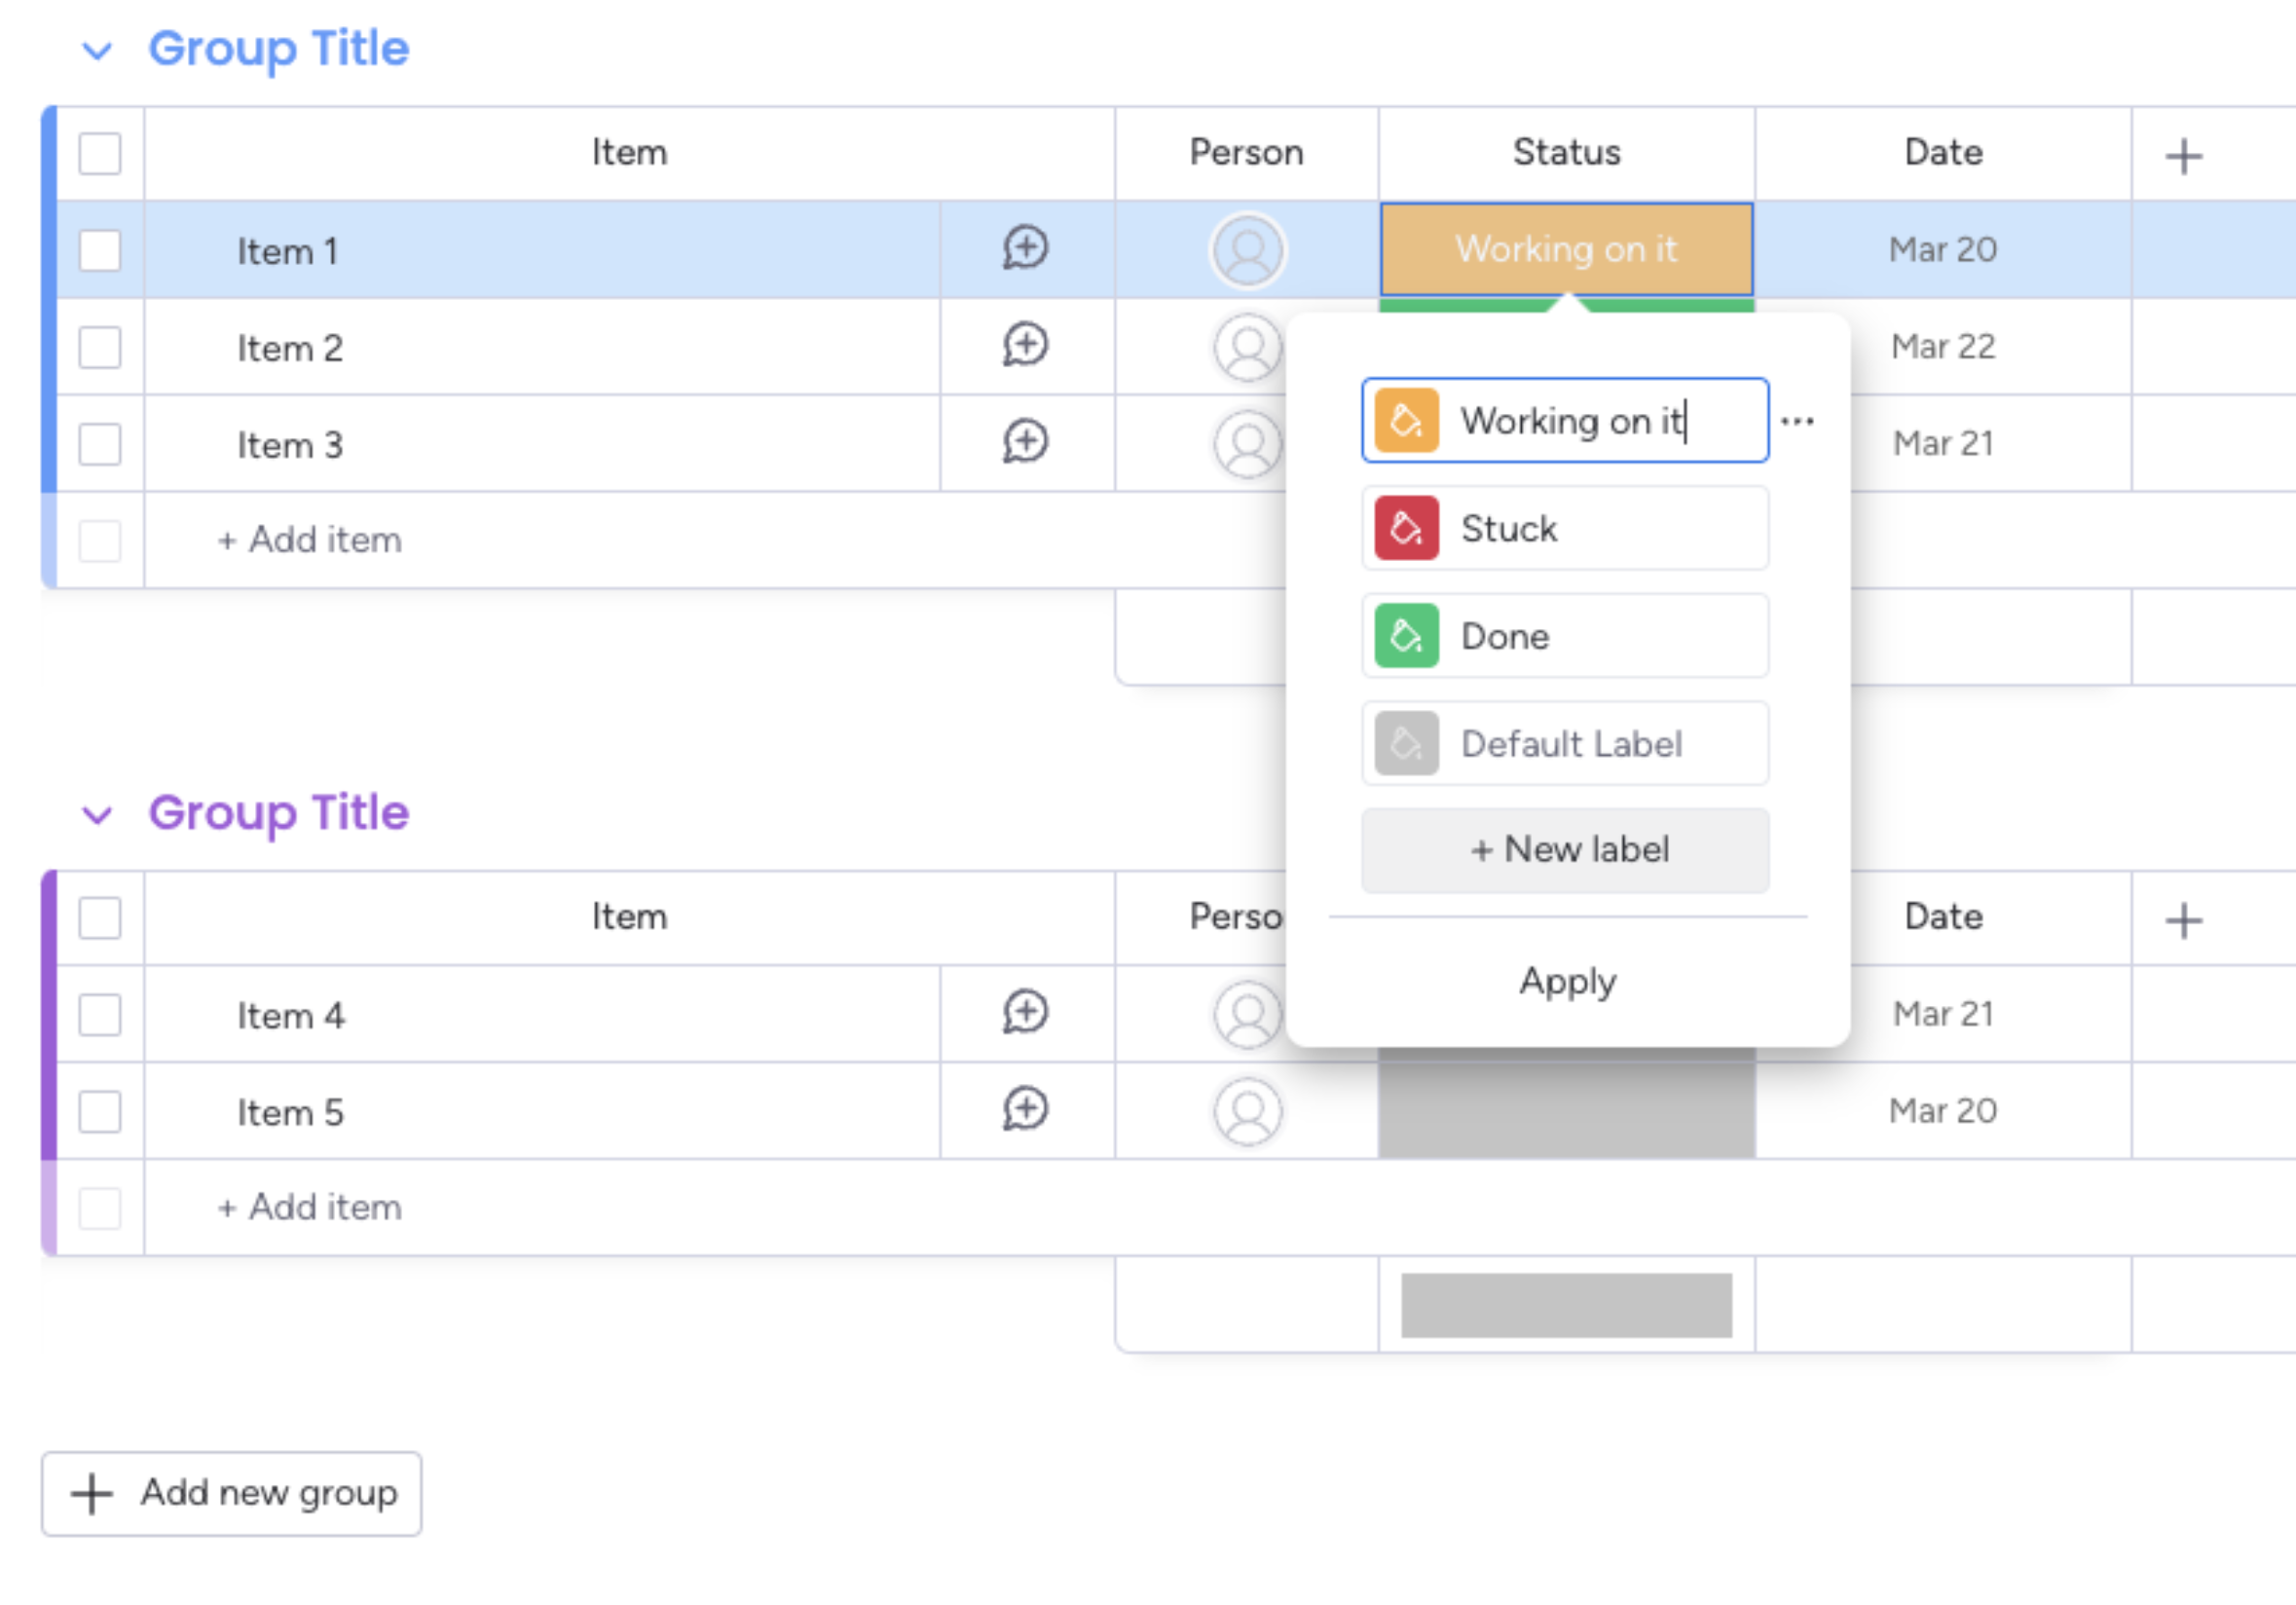
The Status column is the backbone of your workflow in monday.com, and Workflow Hub relies on this to define and visualize your process. Here's how to set it up:
Navigate to Your Desired Board – Choose the board where you want to implement a workflow. You can use an existing board or create a new one.
Add a Status Column – If your board doesn’t already have one:
Click the “+” button to the right of your existing columns.
Select “Status” from the column types.
Give your column a clear name, such as “Workflow Stage” or “Process Status.”
Define Status Labels – These labels represent the individual steps in your workflow. Examples include:
To Do
In Progress
Under Review
Completed
Blocked
You can customize the labels and colors to fit your team’s terminology and make them visually distinct. Keep your process in mind when naming these statuses, as they will appear throughout your workflow maps.
Best Practices:
Keep it simple: Avoid adding too many statuses that might confuse users.
Use consistent naming: Stick to action-oriented or clear state names.
Review with your team: Confirm the column structure matches your actual process before proceeding to build the workflow.
Step 2 - Set up board workflow
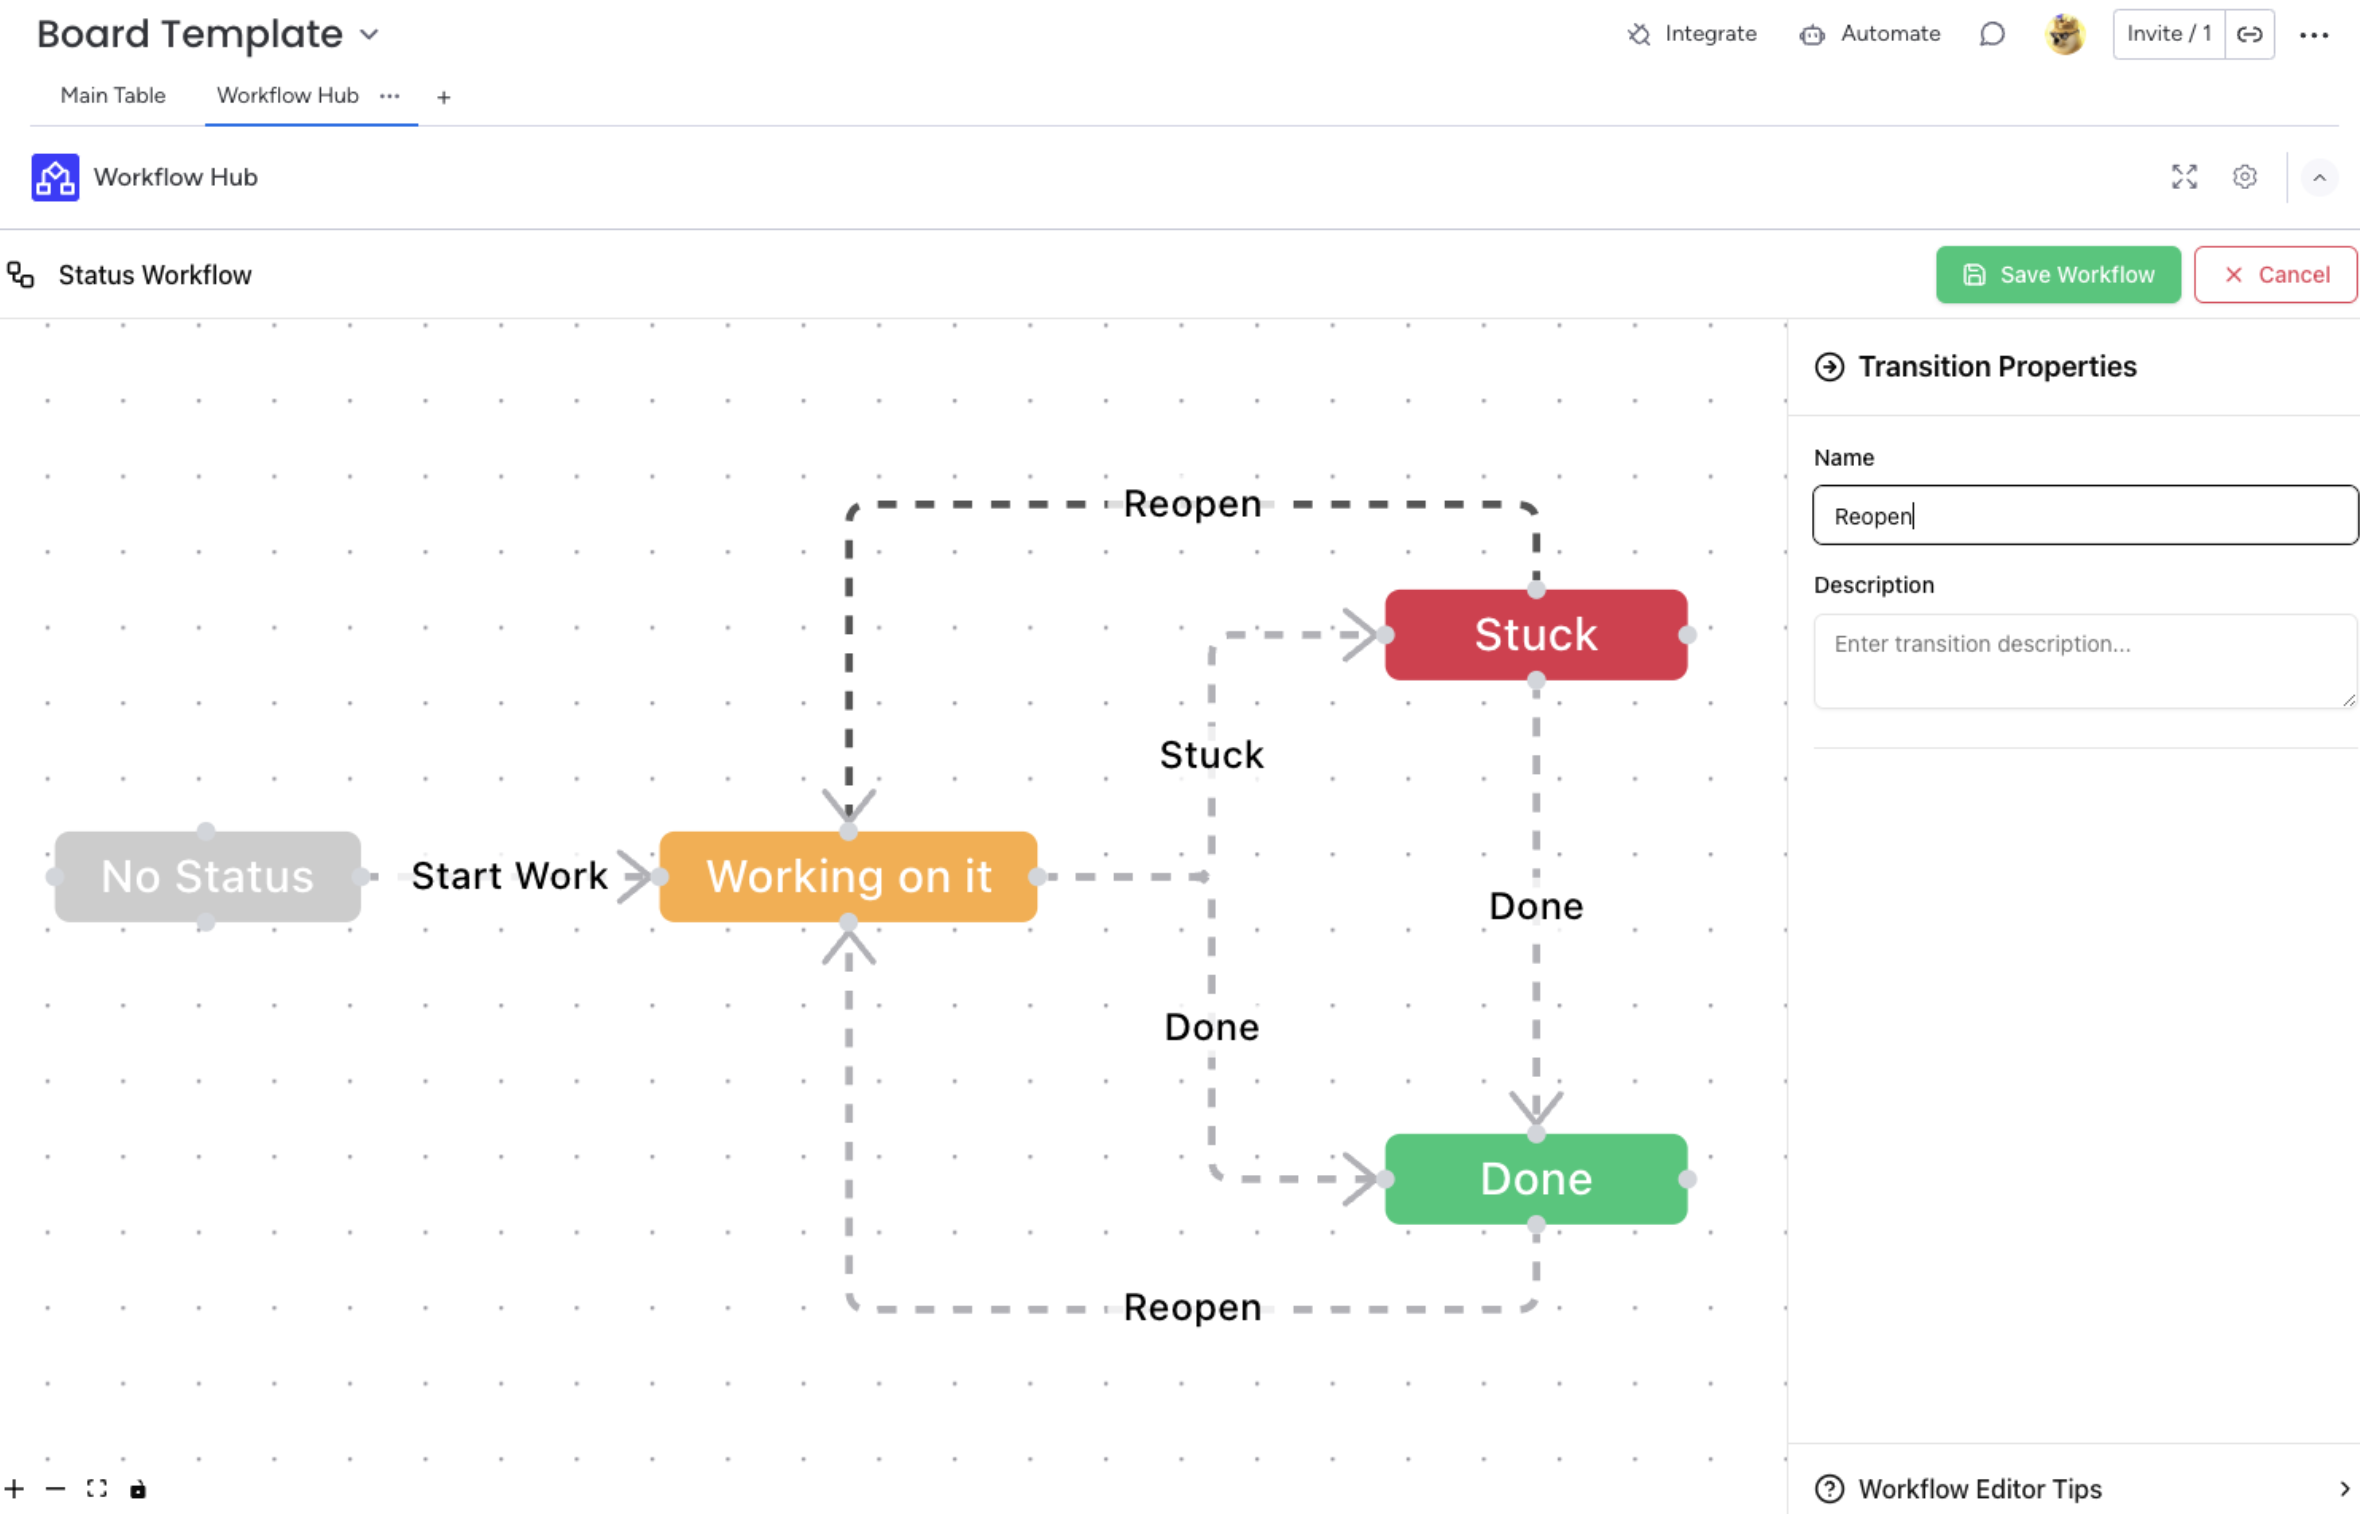
Now that your status column is in place, you’re ready to design your workflow in the Workflow Hub Board View. This view allows you to visually map out how items progress through different stages of your process. Here’s how to do it:
Open the Board View:
Go to the board where you installed Workflow Hub.
Click on “+ Add View” and select “Workflow Hub” under the available apps.
Click “Edit Workflow” to begin designing your process:
Select the status column you want to use for this workflow. Only one status column can be active per workflow.
Create transitions between statuses by clicking on a status and dragging to another. This creates a directional arrow representing the allowed path between stages.
Name each transition – These names appear on the arrows and clarify the action, such as “Start Review,” “Send to QA,” or “Mark as Done.”
Organize your flow:
You can drag and drop status nodes to rearrange them visually.
Avoid unnecessary loops unless they reflect real-world backtracking.
Use naming conventions that match team vocabulary for clarity.
Save your workflow – Once all transitions are set and the layout looks clean, click Save. The app will now use this map to guide how items move through statuses.
This board-level workflow provides a visual framework for your process, allowing everyone to see and understand how tasks should progress.
Step 3 - Move items through workflow
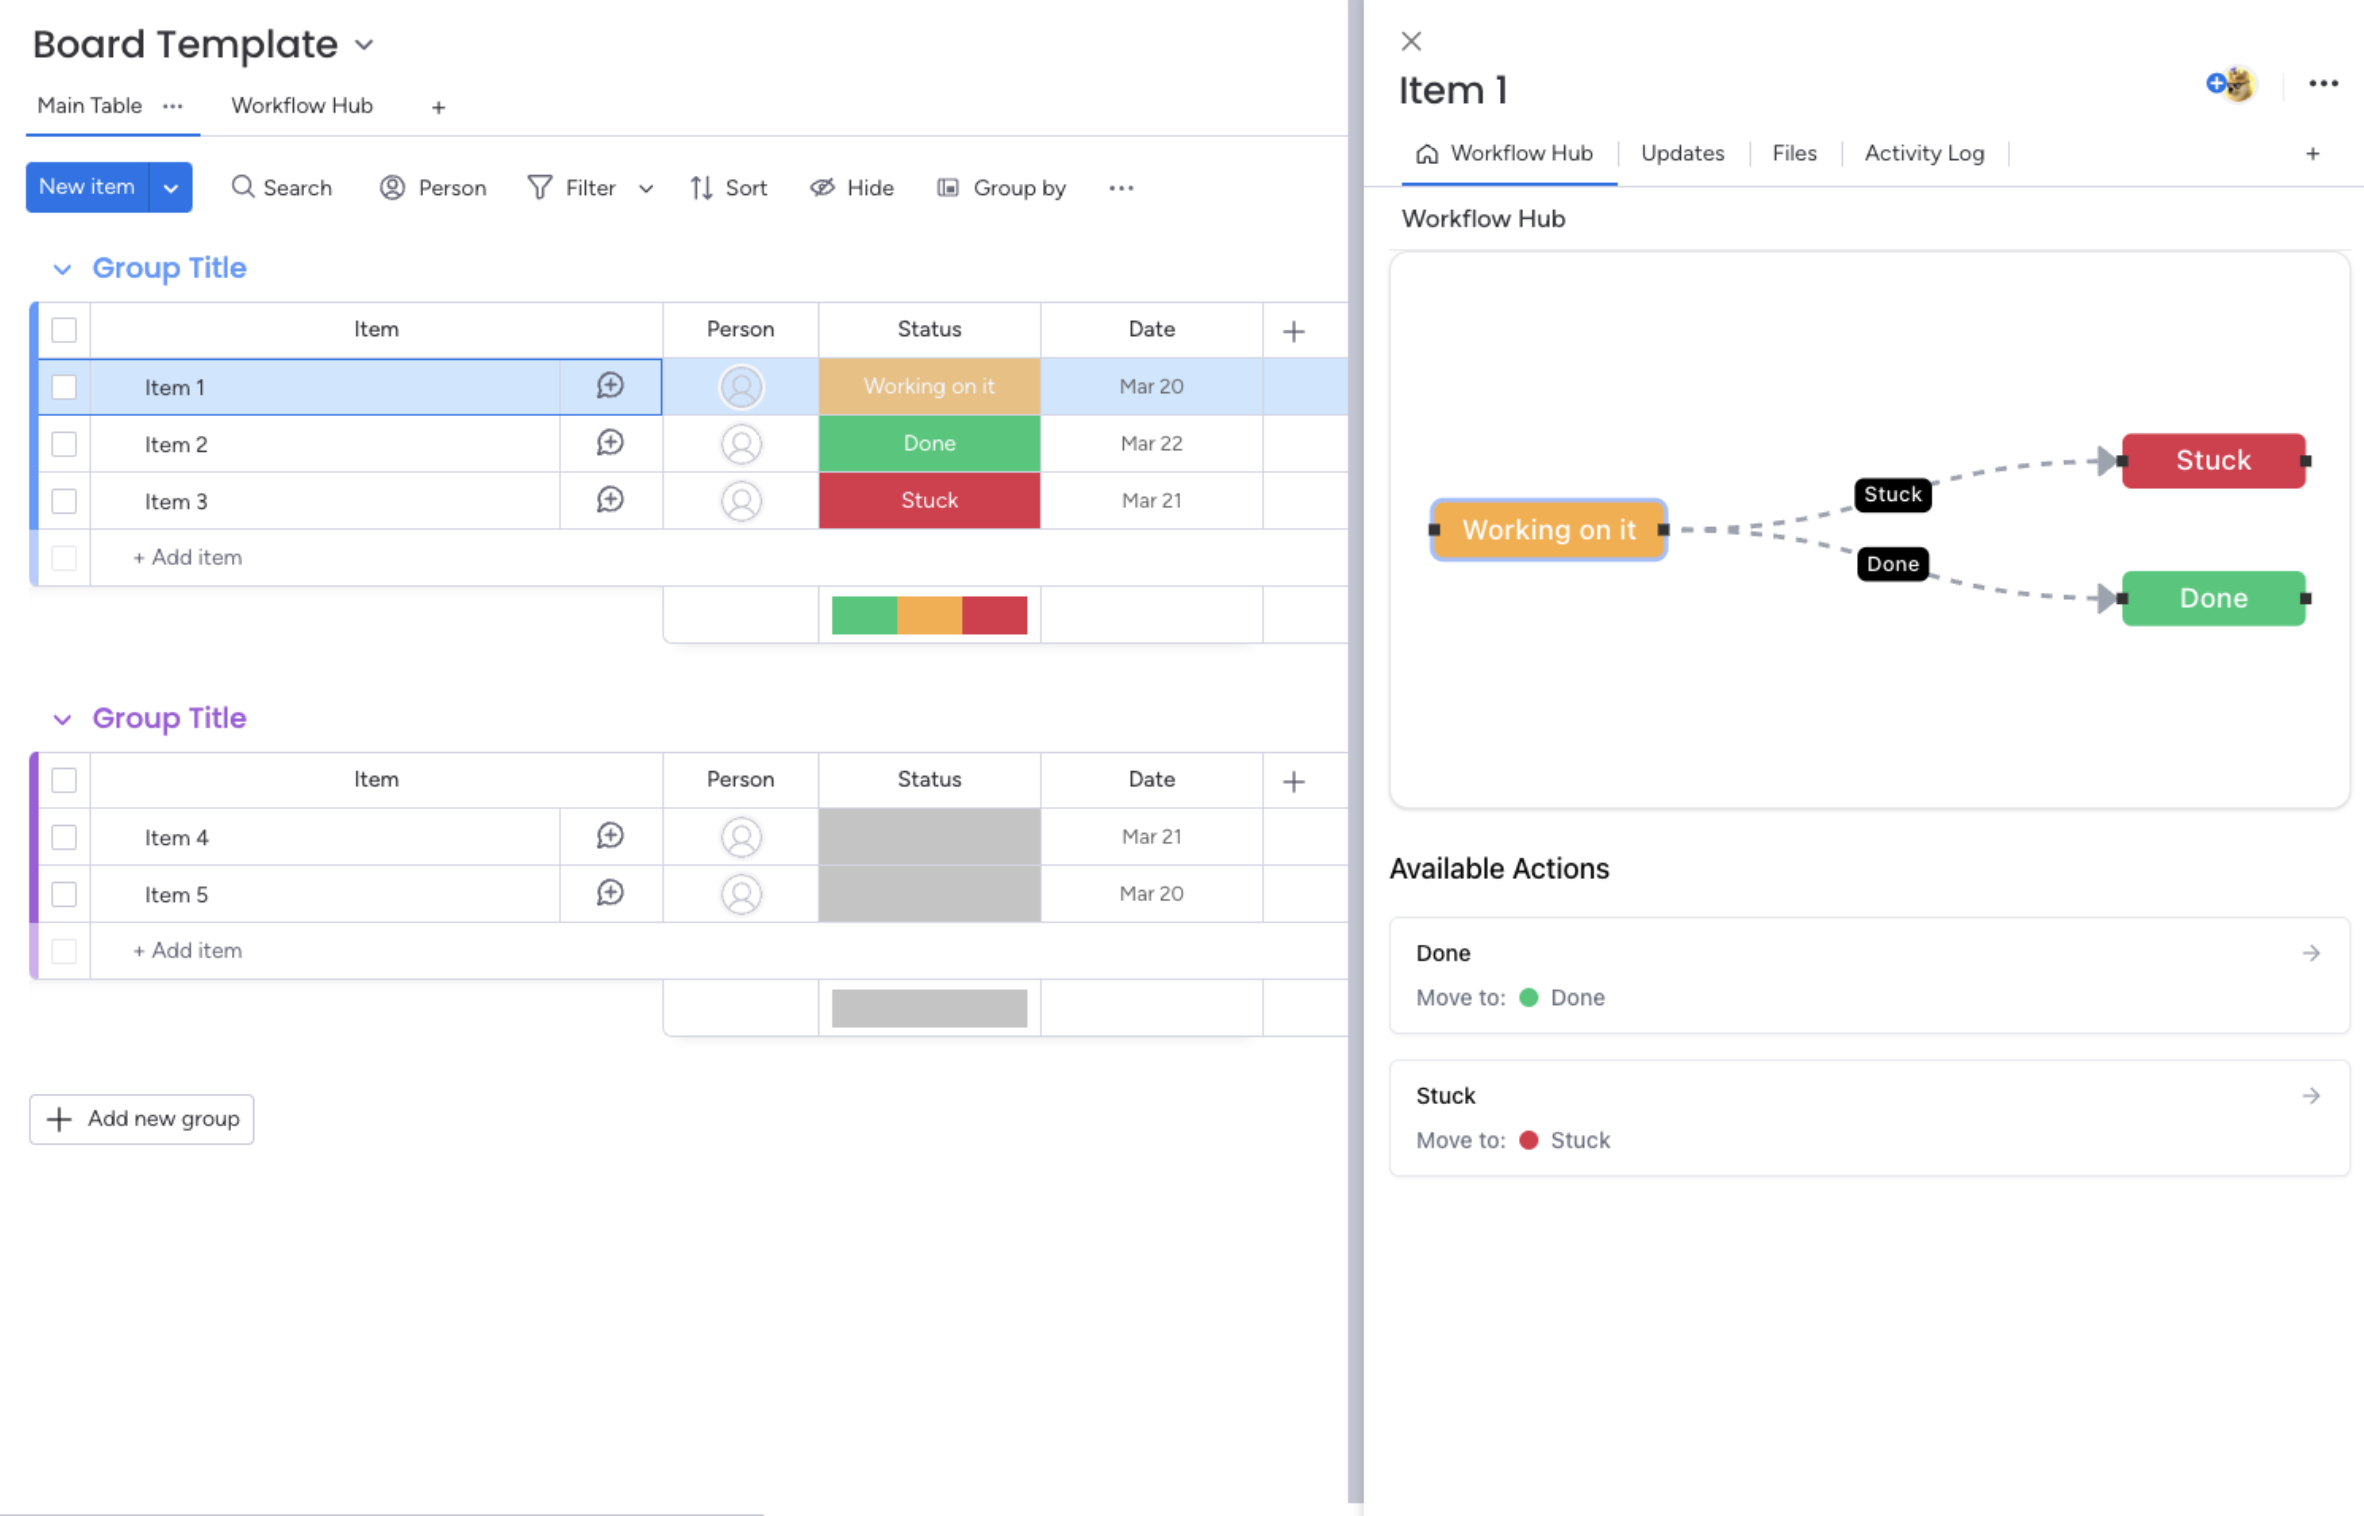
With your workflow in place, it’s time to use Workflow Hub at the item level — this is where daily task management happens. The Item View gives each team member clarity on what step an item is in and what actions are possible next.
Access the Workflow Hub Item View:
Click into any item on the board.
Select the “Workflow Hub” tab from the item view options.
If it’s not already visible, click the “+” to add it.
Understand the Interface:
At the top, you’ll see the item’s current status.
Below that is a visual map of all available transitions for that item based on the workflow you created in the board view.
Transitions are shown as clickable paths leading to the next valid statuses.
Taking Action:
Click on any available transition to move the item forward in the workflow.
The status column on the item will update instantly, and any automations tied to that status can also trigger (e.g. notifications, item movement, time tracking).
The item view makes Workflow Hub not just a planning tool, but a real-time operational assistant for your team. It ensures tasks move correctly and efficiently through your custom-defined process.
Appendix
Permissions
User Type | Item View | Board View | Notes |
Admin | ✅ | ✅ | Can perform all operations |
Member | ✅ | ✅ | Can perform all operations |
Guest | ✅ | ⚠️ | Cannot create/edit workflows |
Viewer | ❌ | ❌ | Cannot use the app |
Limitations
Sub-items are not supported
If you add 'child' items to items, they cannot currently have a workflow applied.
Only top-level items can have workflows applied to them.
Media
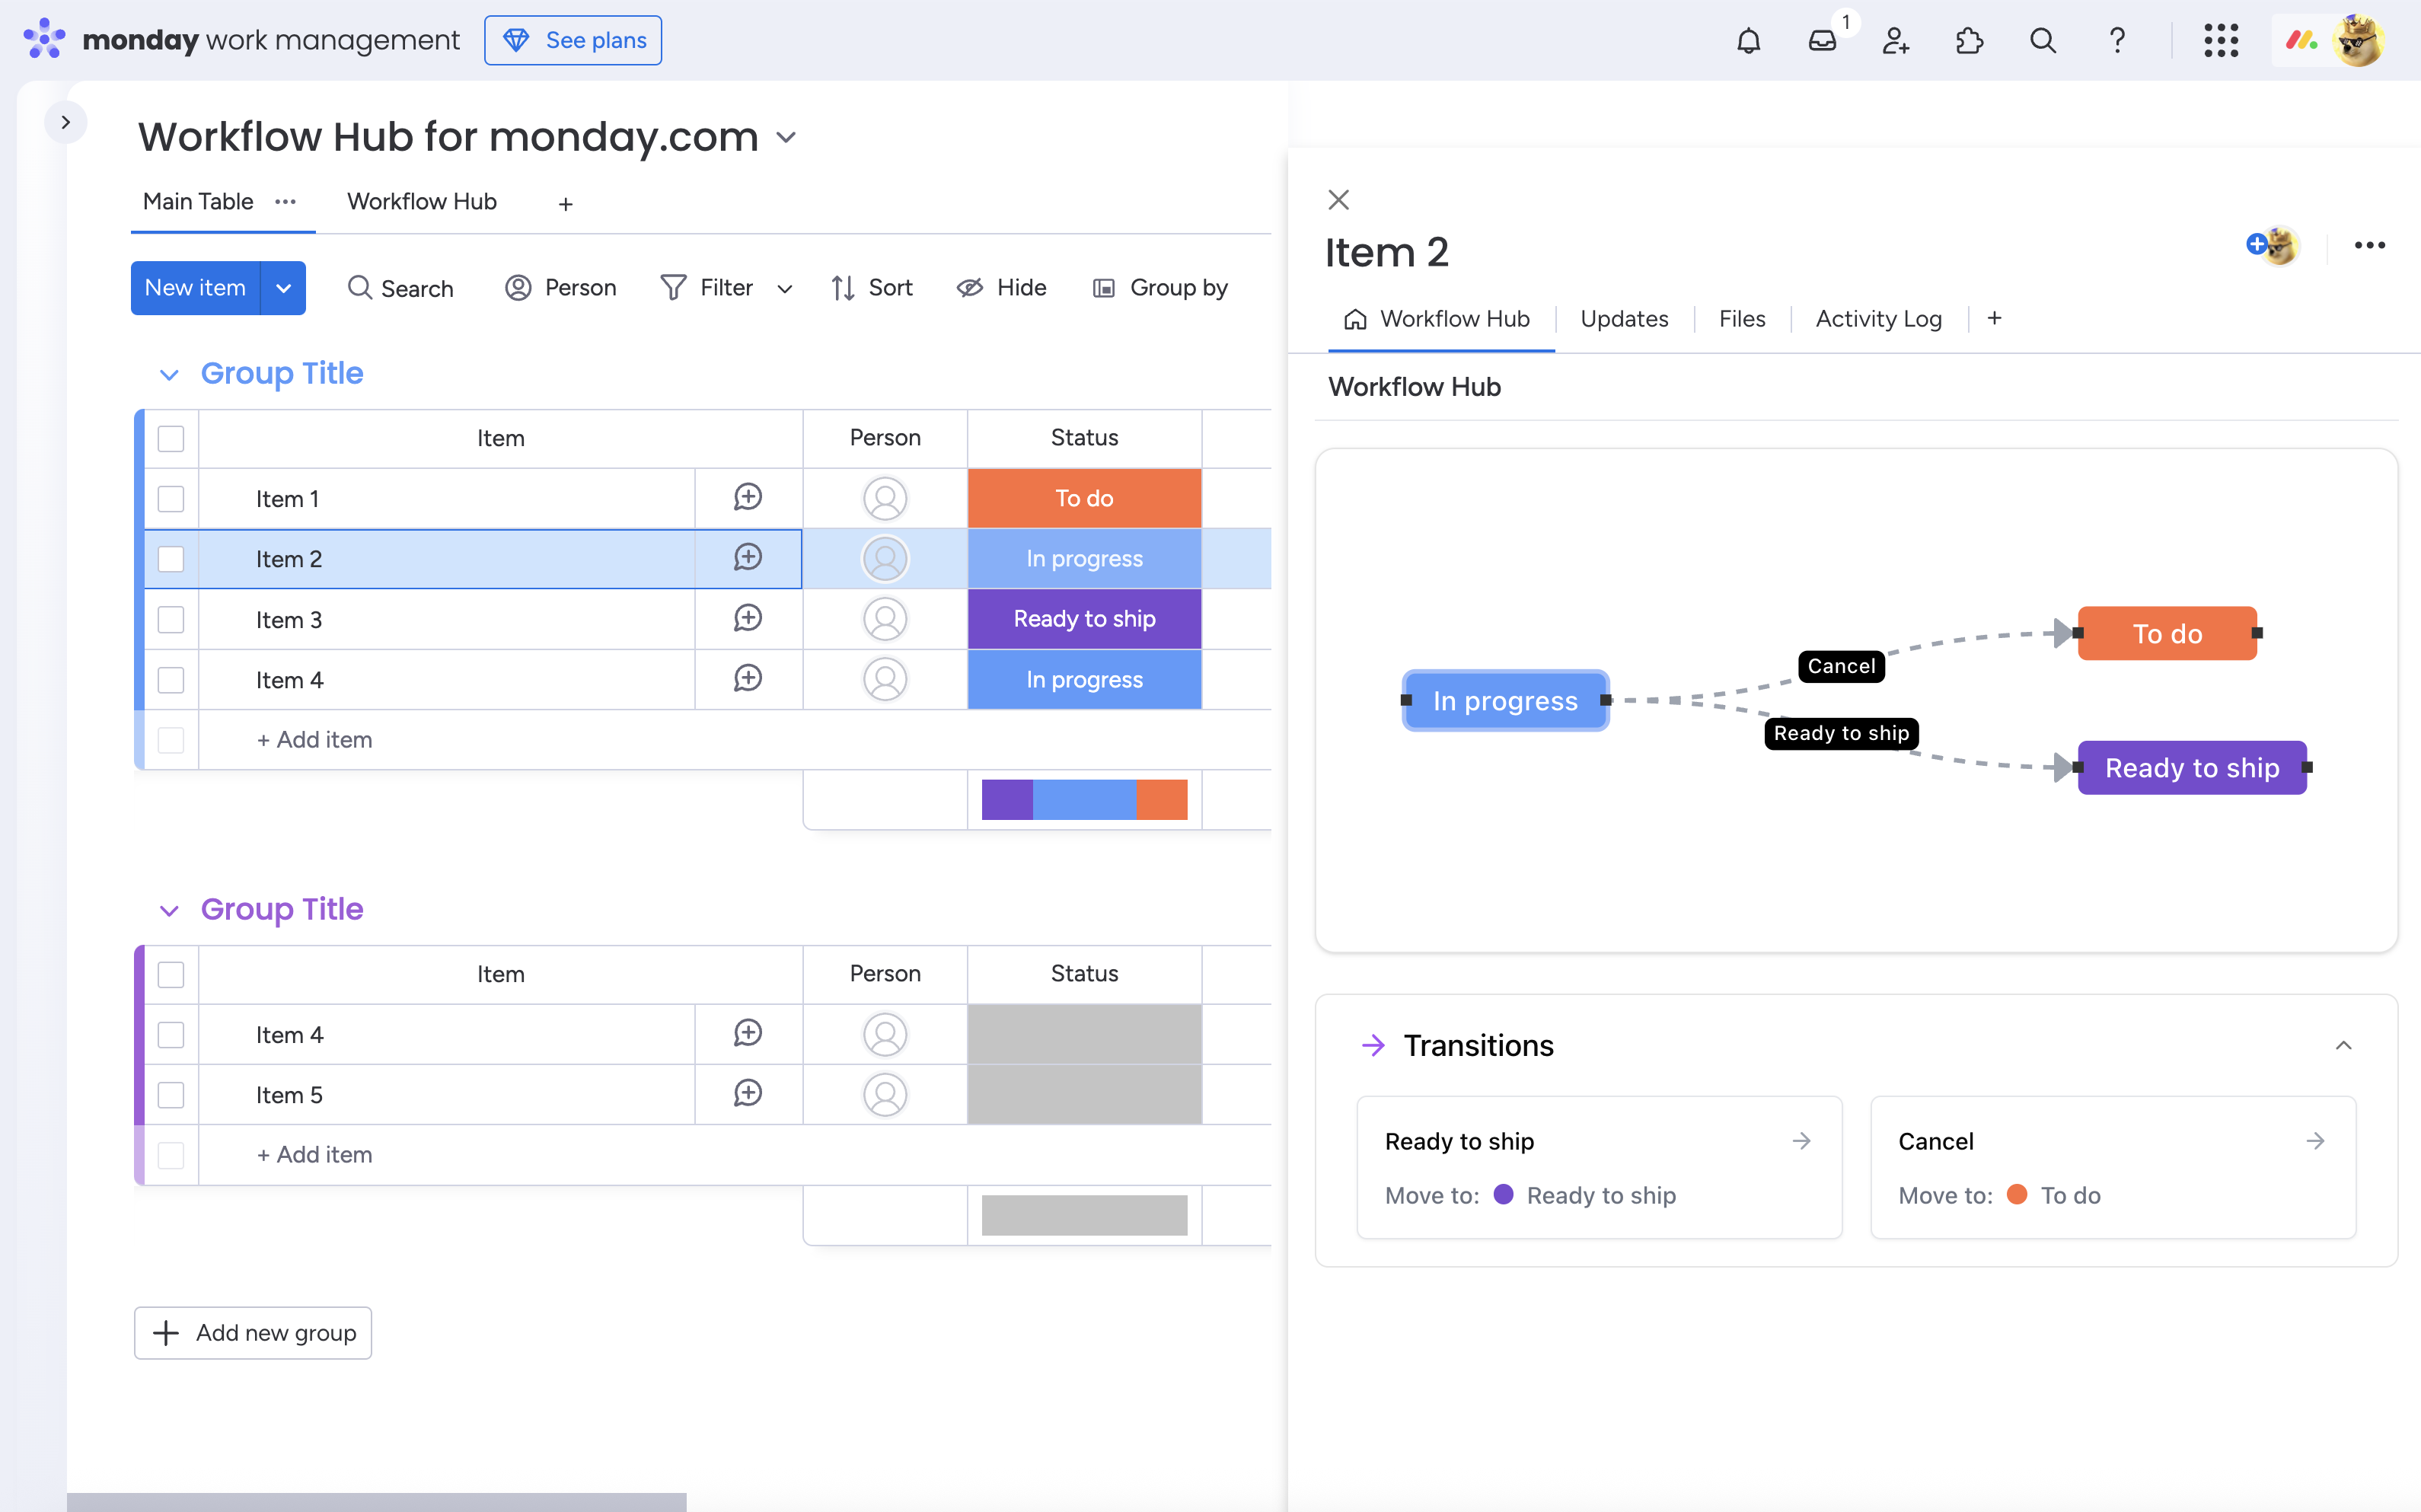
Visualize workflow transitions with the Item View
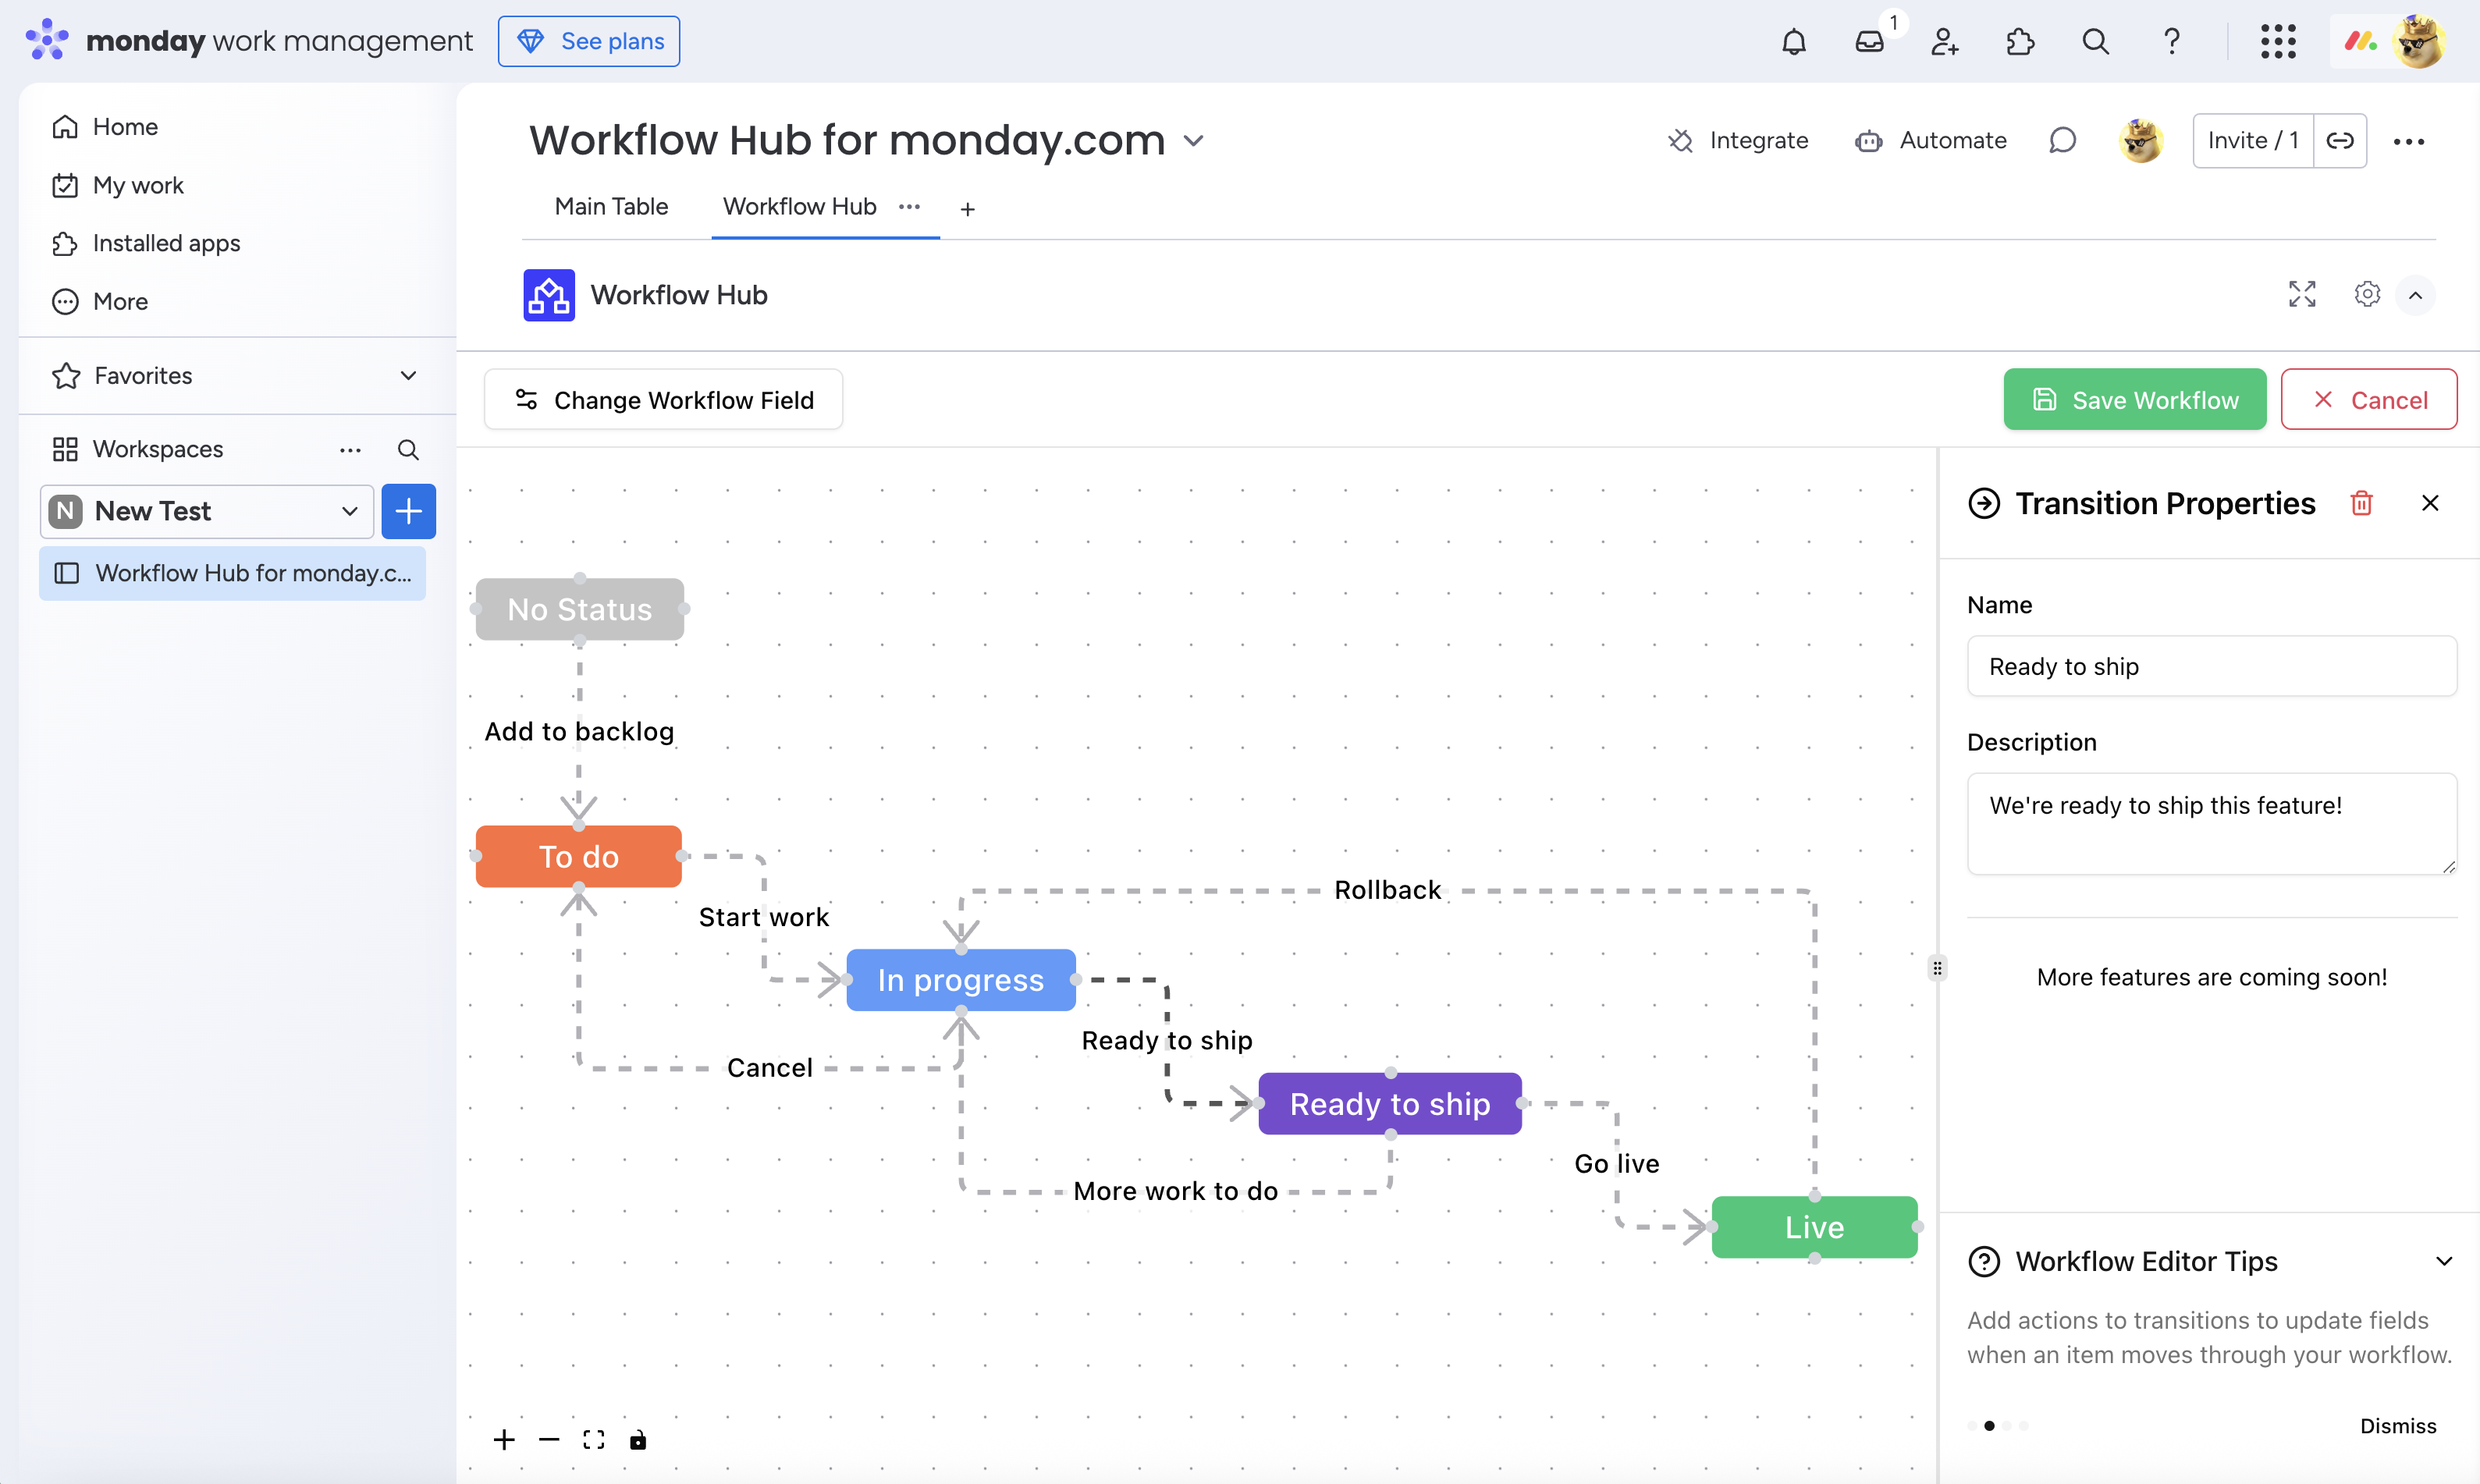
Create custom workflows for your status columns with the Board View
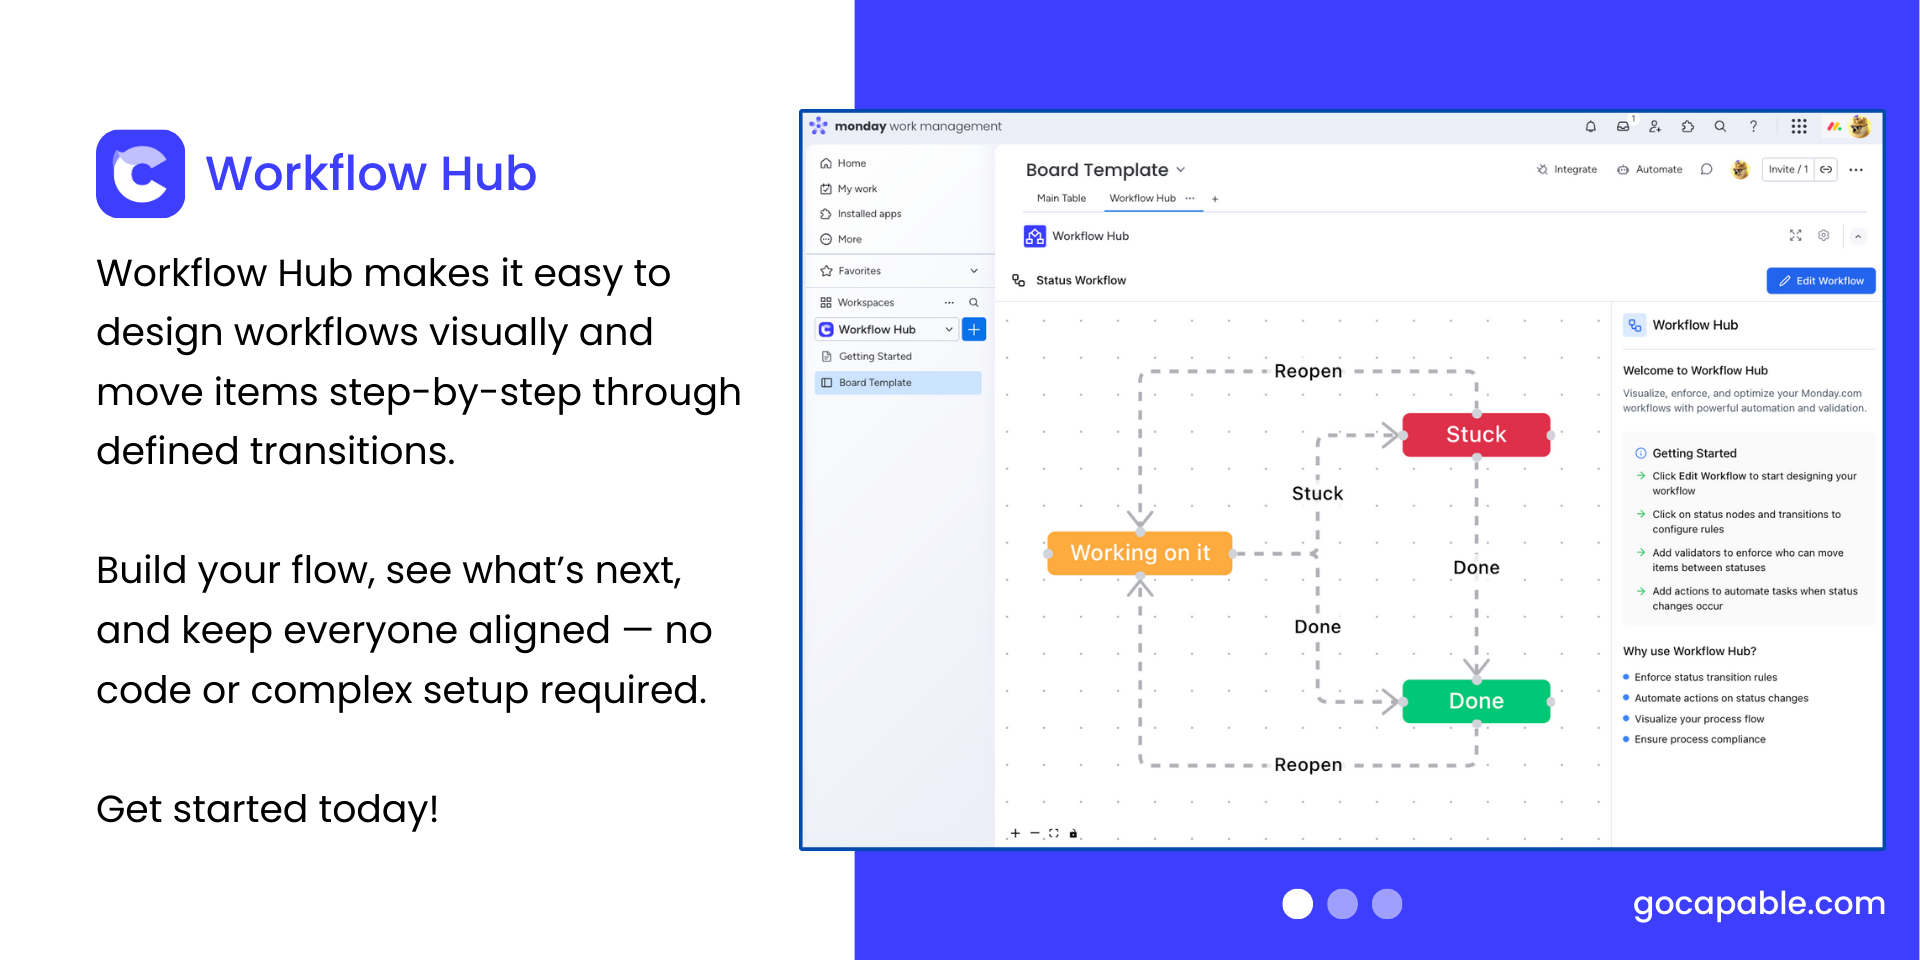
Create workflow visually with drag and drop
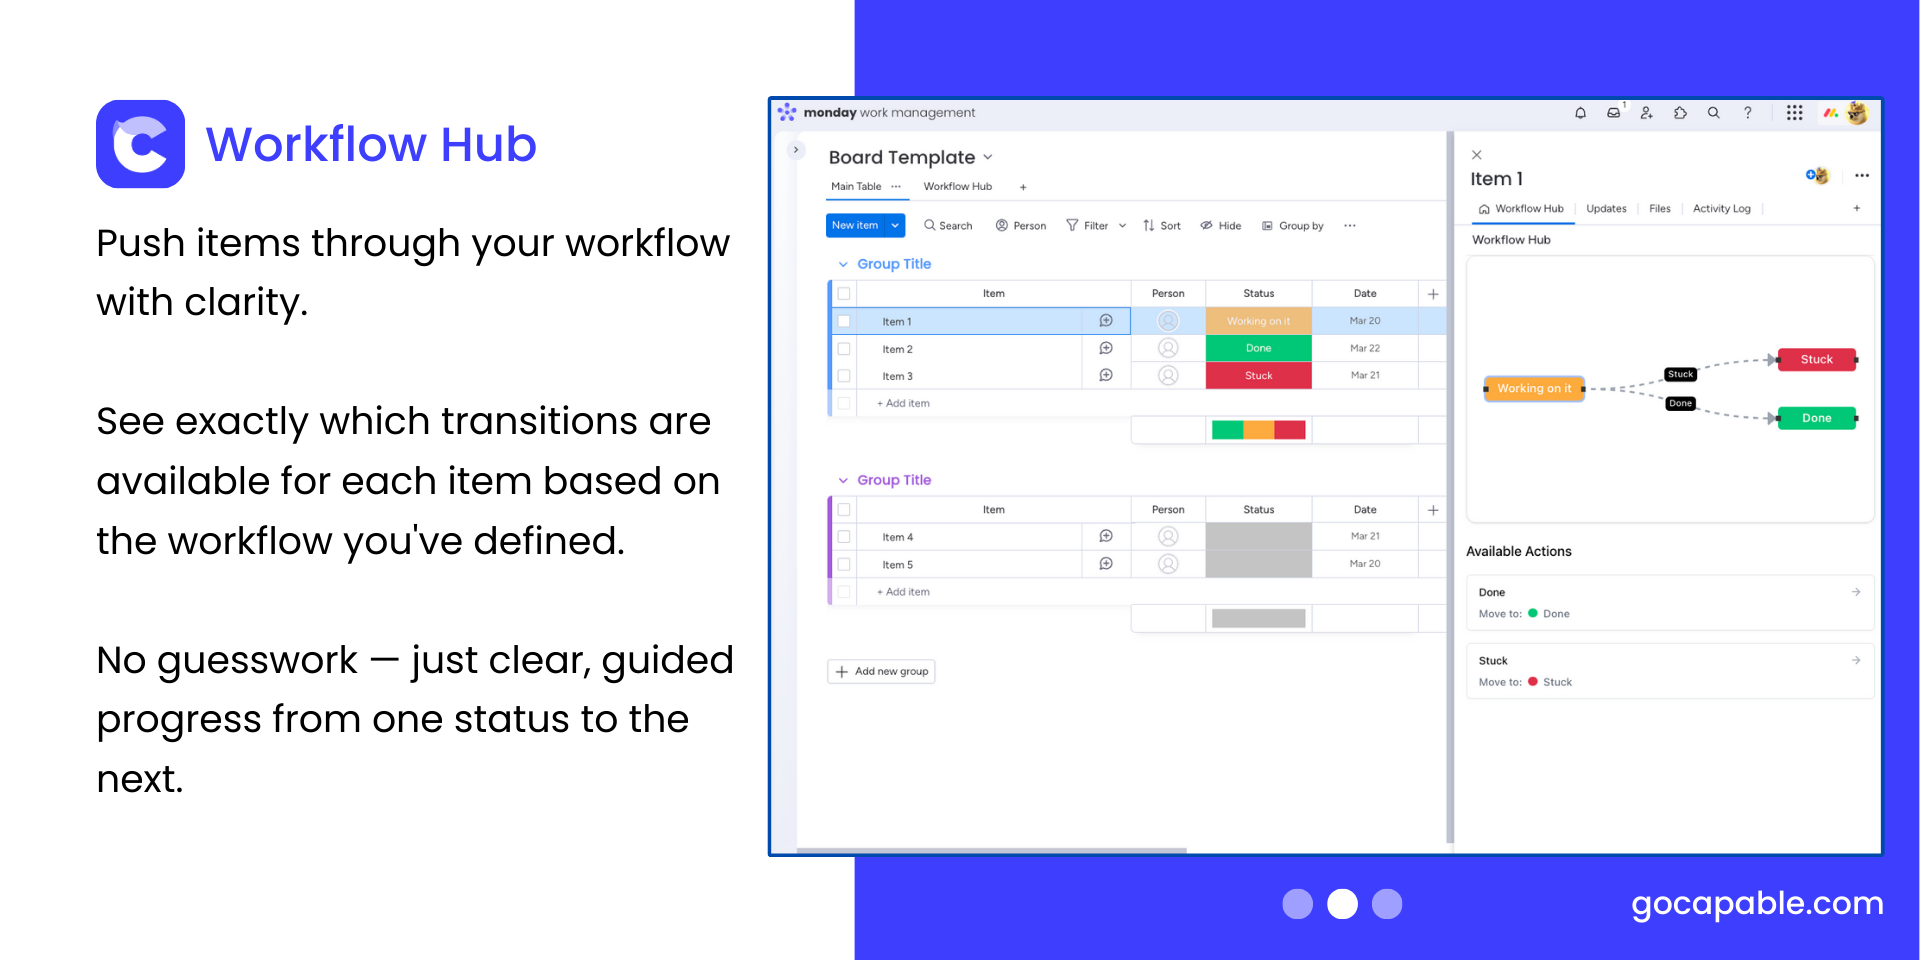
See what actions are available on items
Design once, applies to all items
.png)